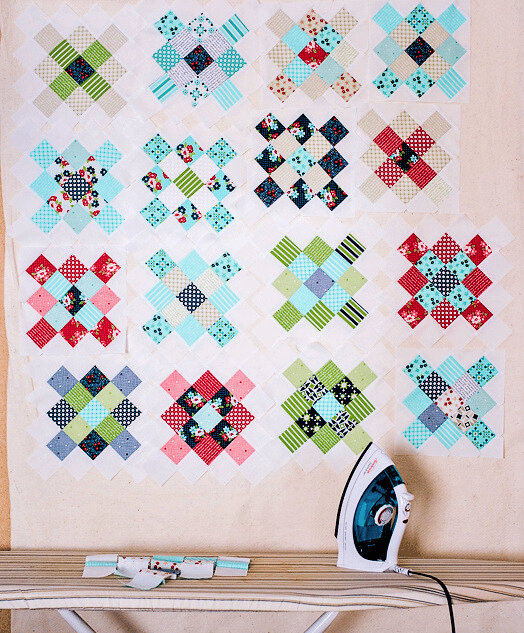
Difficulty: Medium
Skill Level: Intermediate
Things You’ll Need
Fabric
- A partial jelly roll
- 3.5 yards background (white) fabric (x36 2.5in x WOF strips and x6 4.5in x WOF strips)
Equipment / Tools
- Baste spray, safety pins, or other basting products
- Rotary Cutter
Number of Blocks: 30
Quilt Dimensions: Approx: 60″ x 70″
Each block contains:
- 12 – 2.5″ white squares (or 2.5″ x 2.75″ for easier trimming)
- 13 assorted 2.5″ squares [ 1 center, 4 middle color, 8 outer color ]
Instructions
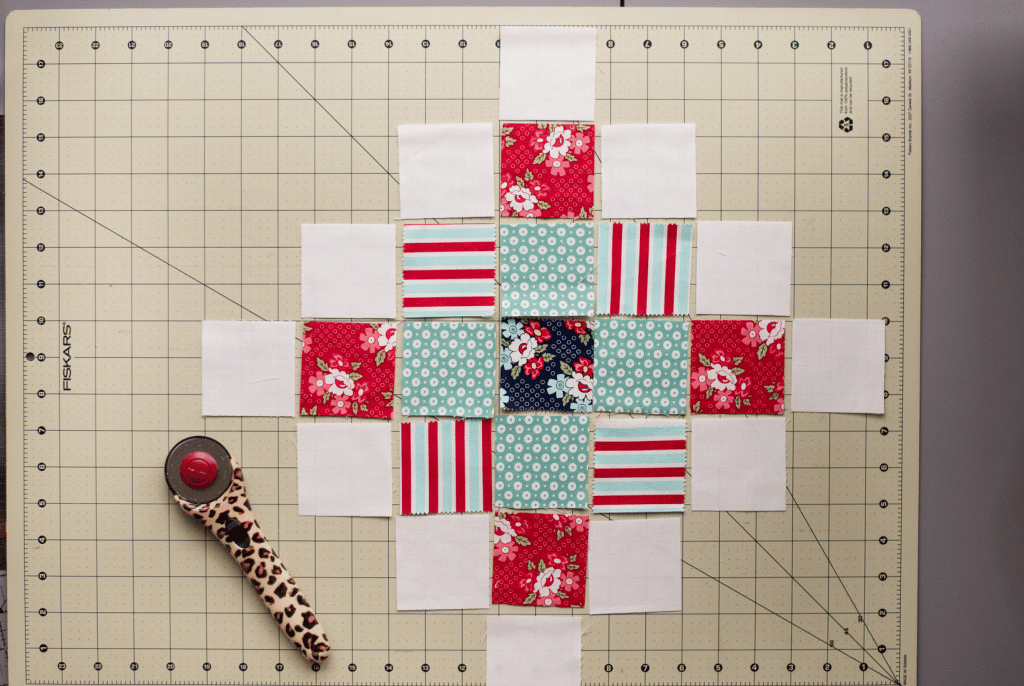
Step 1
Lay out each block as shown in the image and use se a different color for each round of squares.
Step 2
Sew together rows using 1/4″ seam allowance. Press seams open or each row in the opposite direction to nest your seams.
Step 3
Line up seams and sew rows together. The top 2.5in square should be centered and sewn as shown below. Press seams open or away from the center.
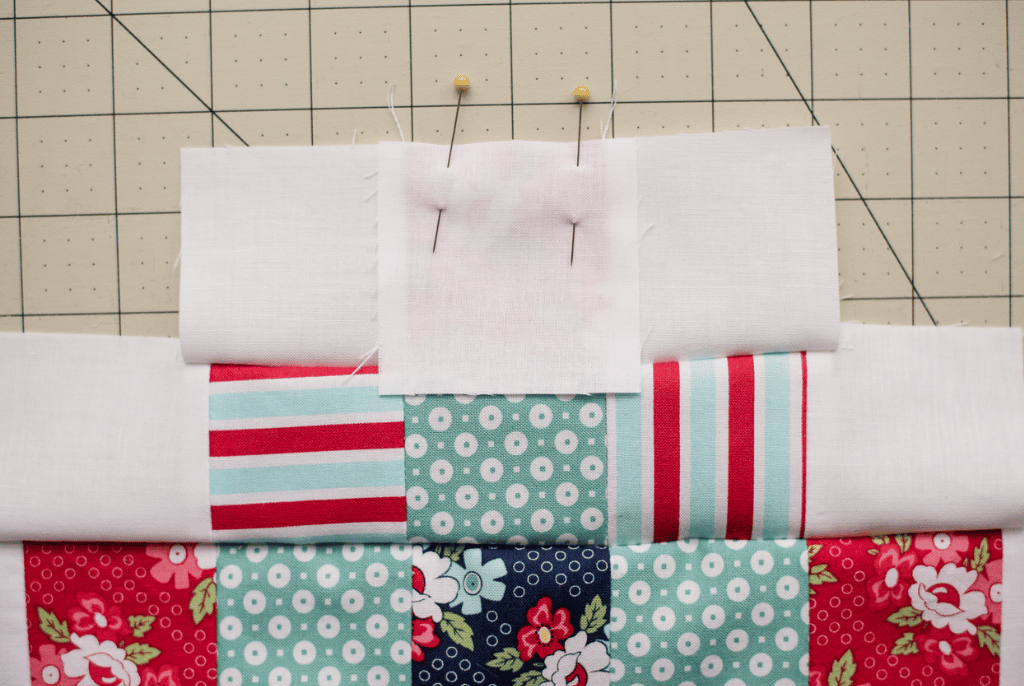
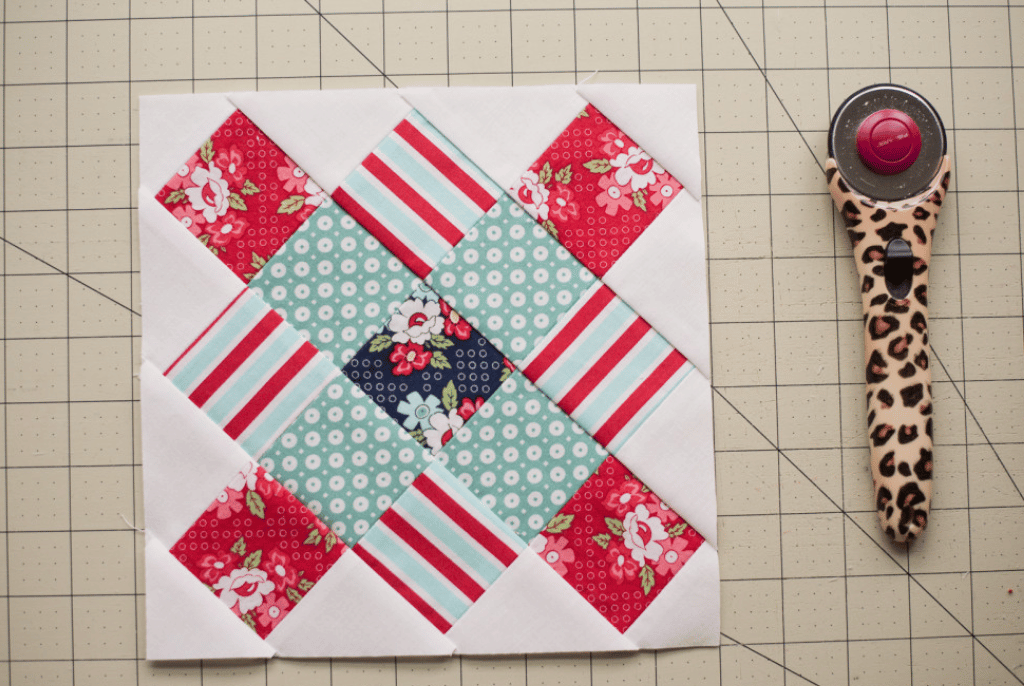
Once rows are sewn and pressed, the granny square block should look like the image below.
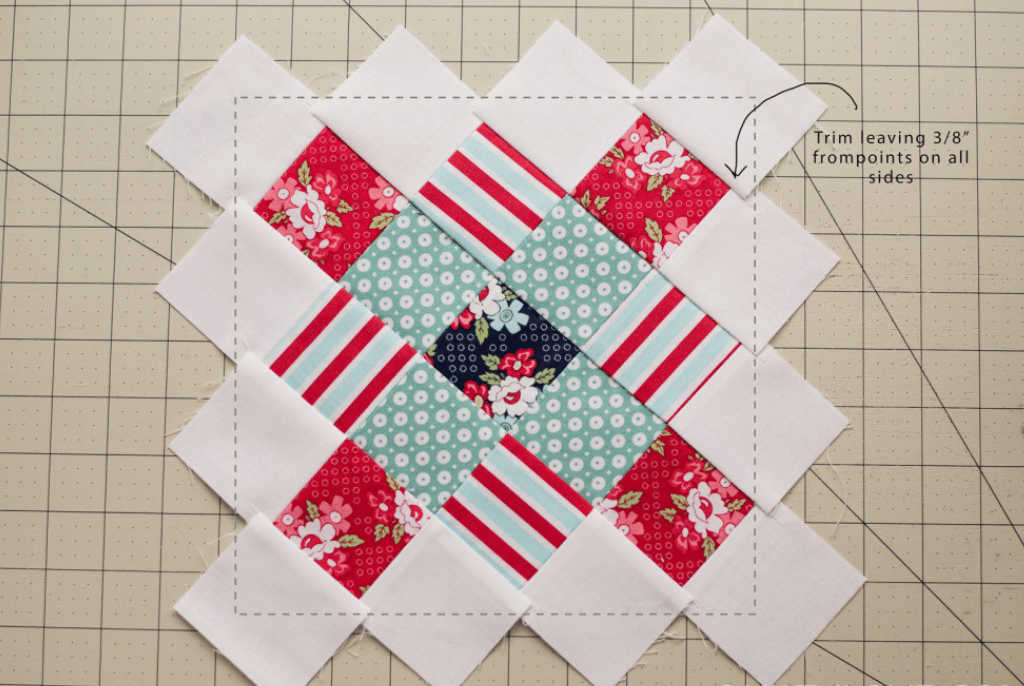
Step 4
Trim block square block leaving 1/4″ – 3/8″ from each point. Trim to 8-3/4in – 8-7/8in square. Measure a few blocks before trimming to see what size your blocks are turning out. Then trim each one to the exact same size.
Step 5
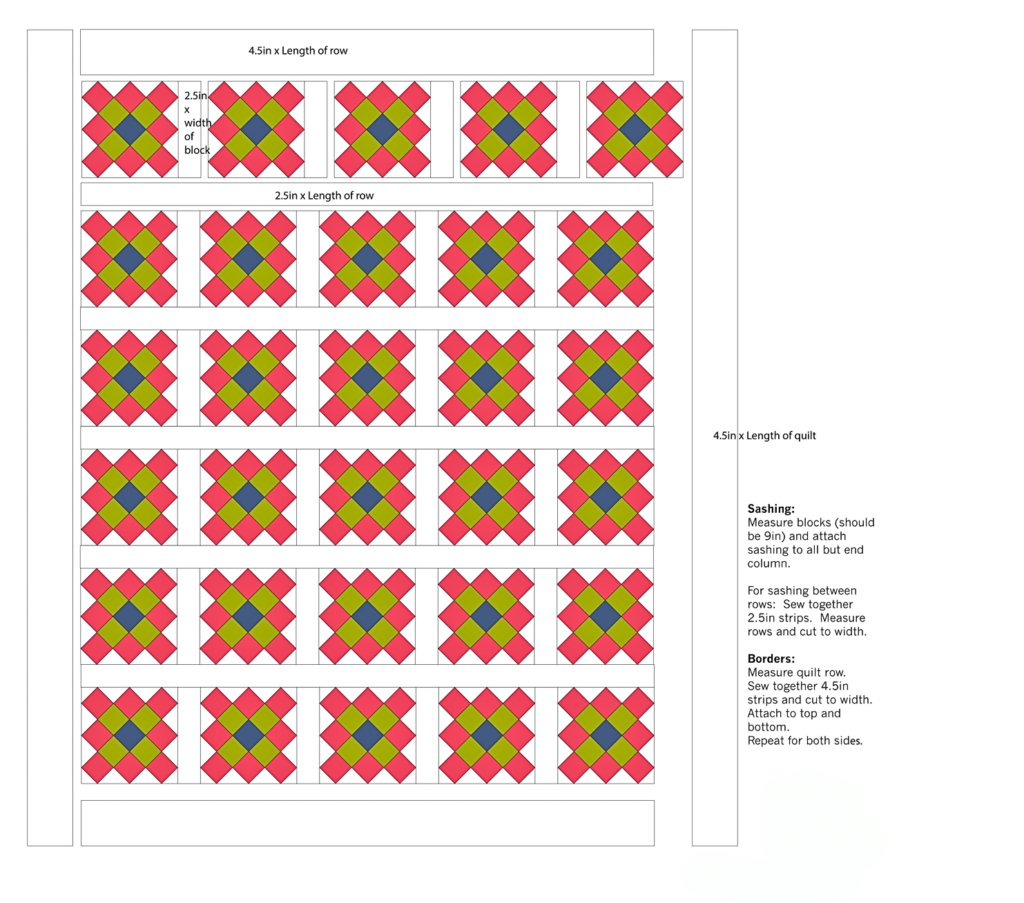
Lay out granny squares however you like. Add 2.5″ white sashing between the quilt blocks as you sew the rows together. Then, sew together the quilt top in rows leaving 2.5in wide sashing between each row. After that, you’ll need to add 4.5″ white borders to the top and bottom and 4.5″ white borders on each side.
Note: If you have any questions regarding this step or having trouble, check out the image below.
Lastly,
Be sure to press and starch each scrappy granny square block. These blocks have lots of seams, so searching will help! As for the binding, you can check out our machine binding tutorial for step-by-step instructions instead of searching for one!
Leave a Reply