Creating a king-size quilt on a standard domestic machine feels daunting, yet thousands accomplish this feat successfully. The secret lies in strategic planning, proper technique, and breaking down the enormous project into manageable sections. This comprehensive tutorial guides you through every step, from selecting your first pattern to binding the final edge, proving that luxurious king quilts belong within every quilter’s reach.
Step-by-Step Tutorial: Simple Nine-Patch King Quilt
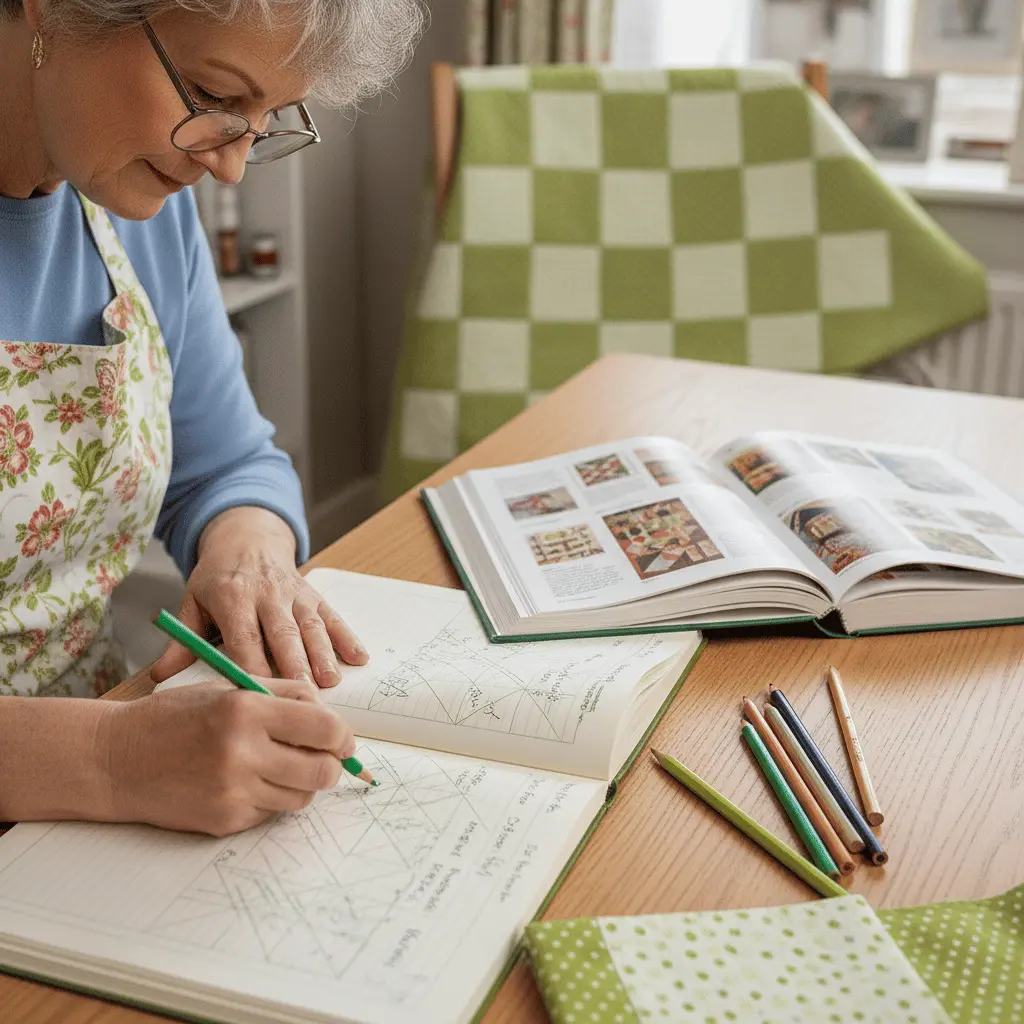
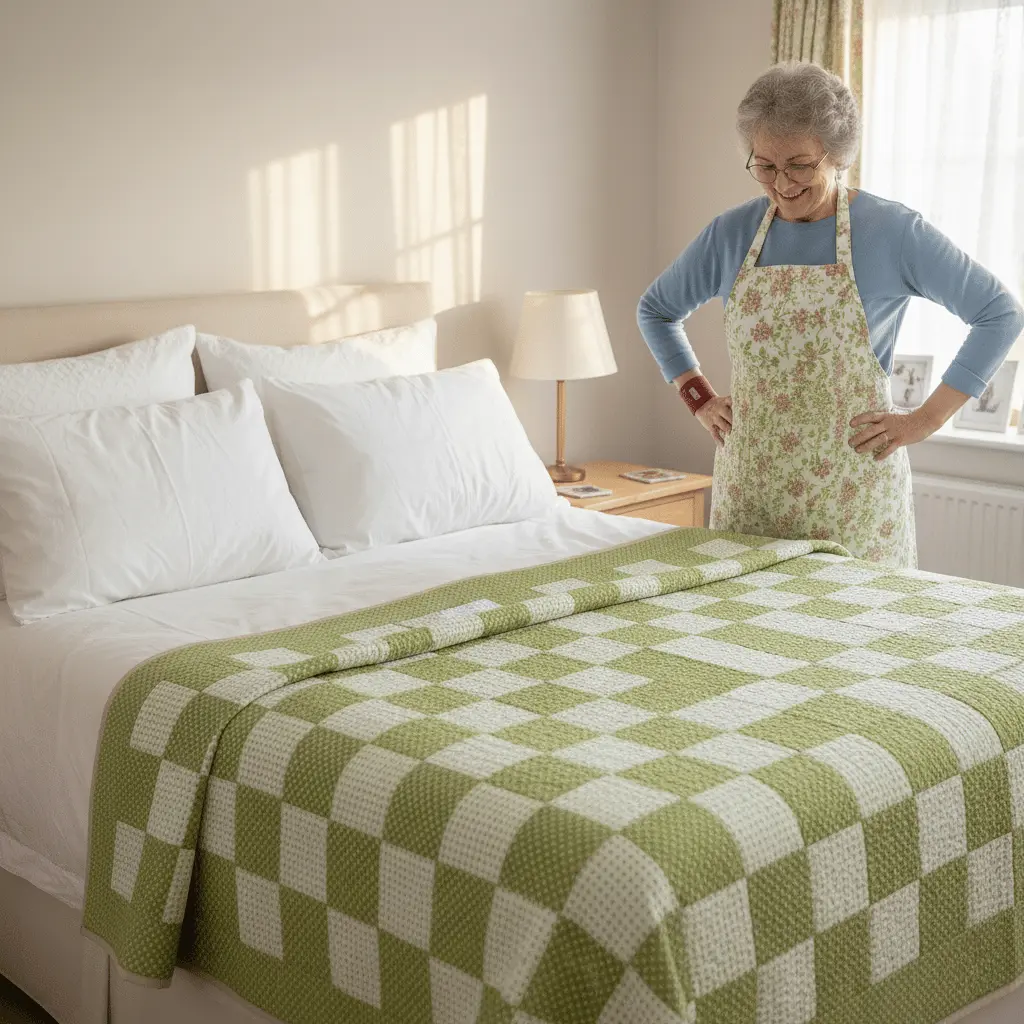
Pattern Selection: We’ll create a classic Nine-Patch king quilt (110″ x 110″) using 15″ finished blocks arranged in a 7×7 grid. This beginner-friendly pattern teaches fundamental techniques while producing impressive results.
Step 1: Gather Your Materials and Tools
Materials Needed:
- 8 yards main fabric (medium/dark)
- 6 yards background fabric (light)
- 10 yards backing fabric (108″ wide) OR 12 yards standard width
- King-size batting (120″ x 120″)
- 1 yard binding fabric
- Thread (neutral color)
Tools Required:
- Regular domestic sewing machine
- Rotary cutter and cutting mat (24″ x 36″)
- Clear acrylic rulers (6″ x 24″ and 12.5″ square)
- Pins or quilting clips
- Iron and ironing board
- Spray starch
- Safety pins or basting spray
- Walking foot attachment
- Scissors
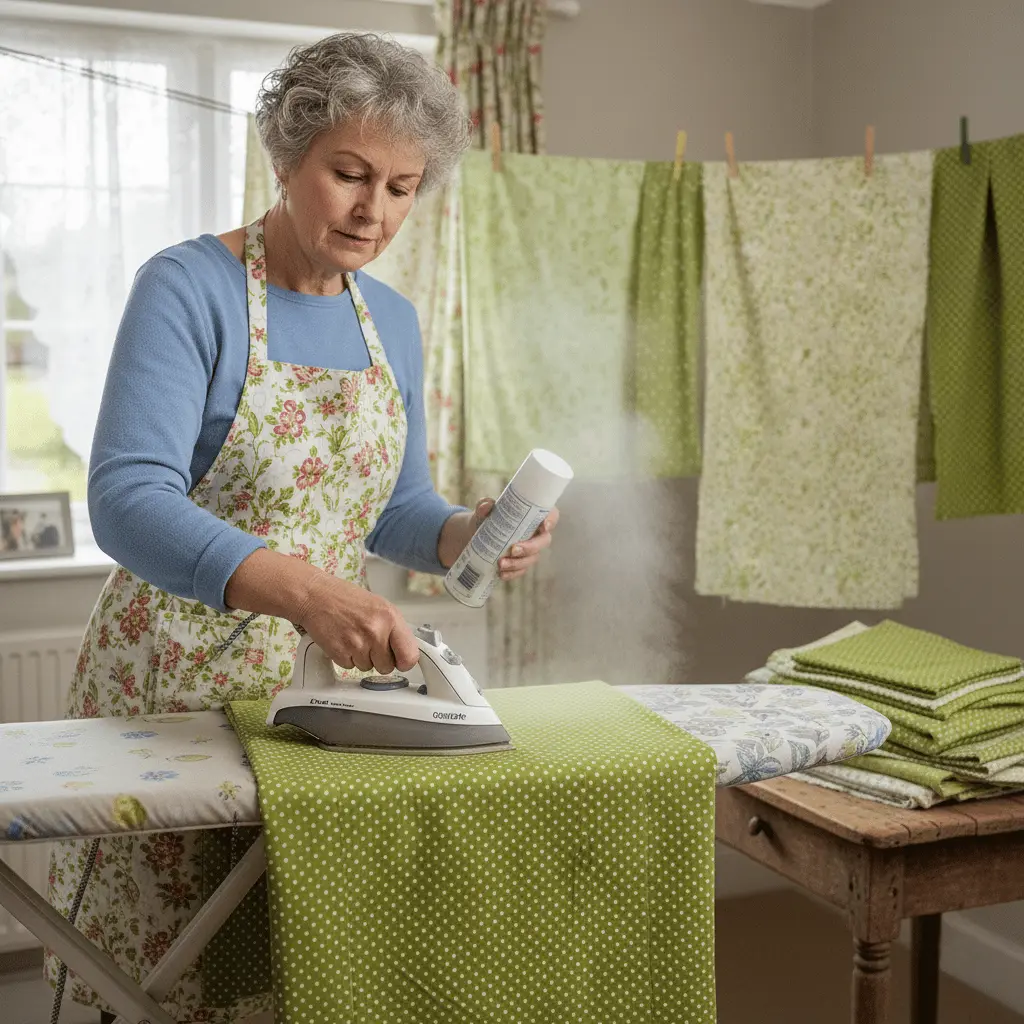
Step 2: Wash and Press Your Fabrics
Prewash all fabrics in warm water to prevent future shrinkage and color bleeding. Tumble dry on medium heat, then press while slightly damp using spray starch for crisp, easy-to-cut fabric.
Why This Matters: Cotton shrinks 3-5% during first washing. Prewashing prevents your finished quilt from puckering after its first launder. Starch adds body, making fabric behave predictably during cutting and piecing.
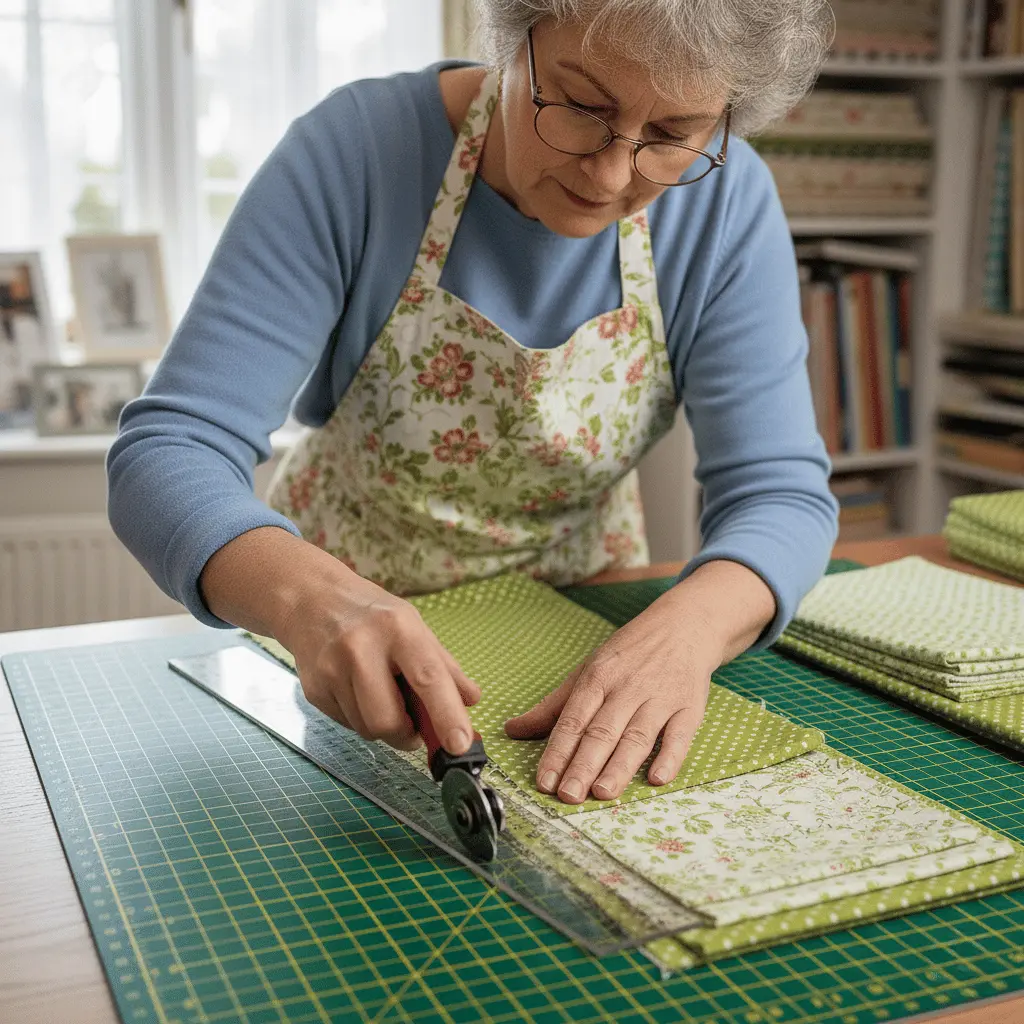
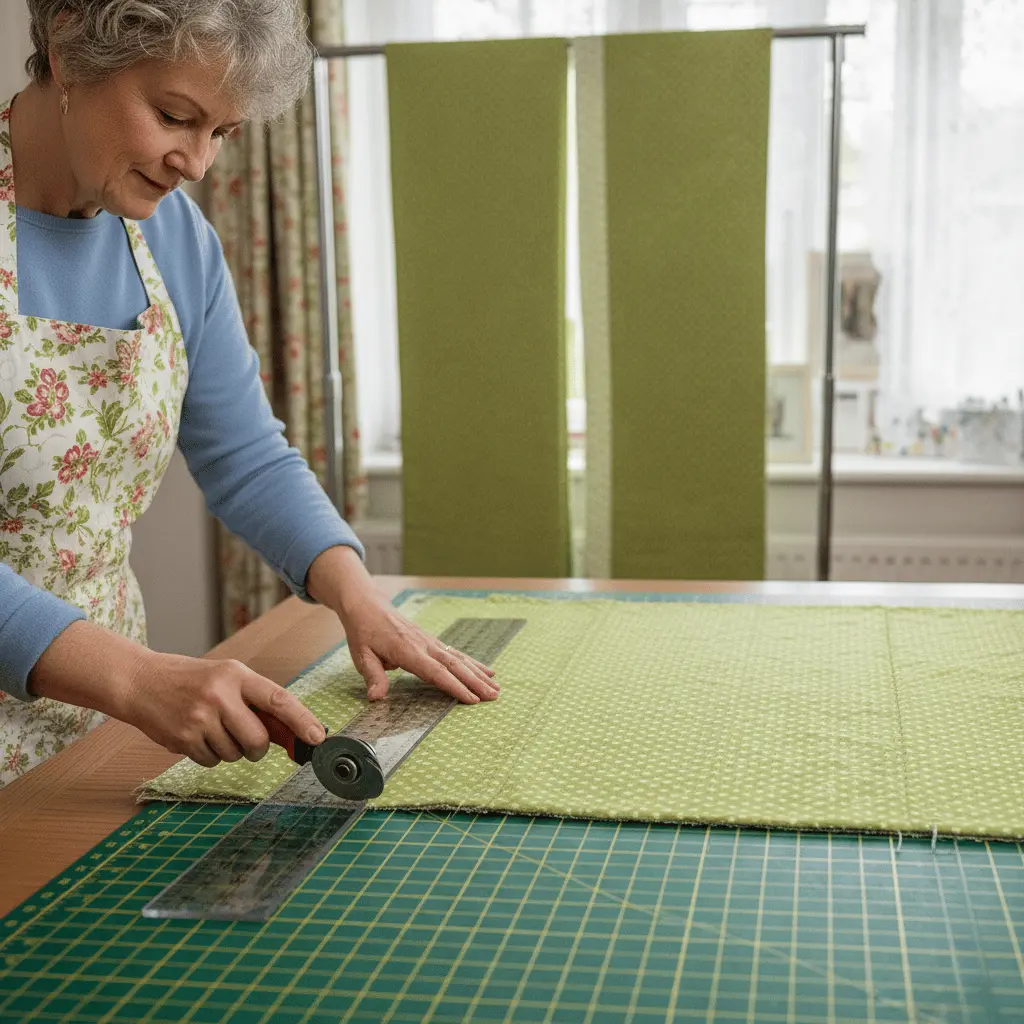
Step 3: Cut Your Fabric Pieces
Cutting Instructions:
- Cut (441) 5.5″ squares from main fabric
- Cut (392) 5.5″ squares from background fabric
- Total: 833 squares for 49 nine-patch blocks
Cutting Technique: Layer fabric in 4-6 layers. Use rotary cutter with firm, even pressure. Cut strips first (5.5″ wide), then sub-cut into 5.5″ squares. Stack cut squares by color.
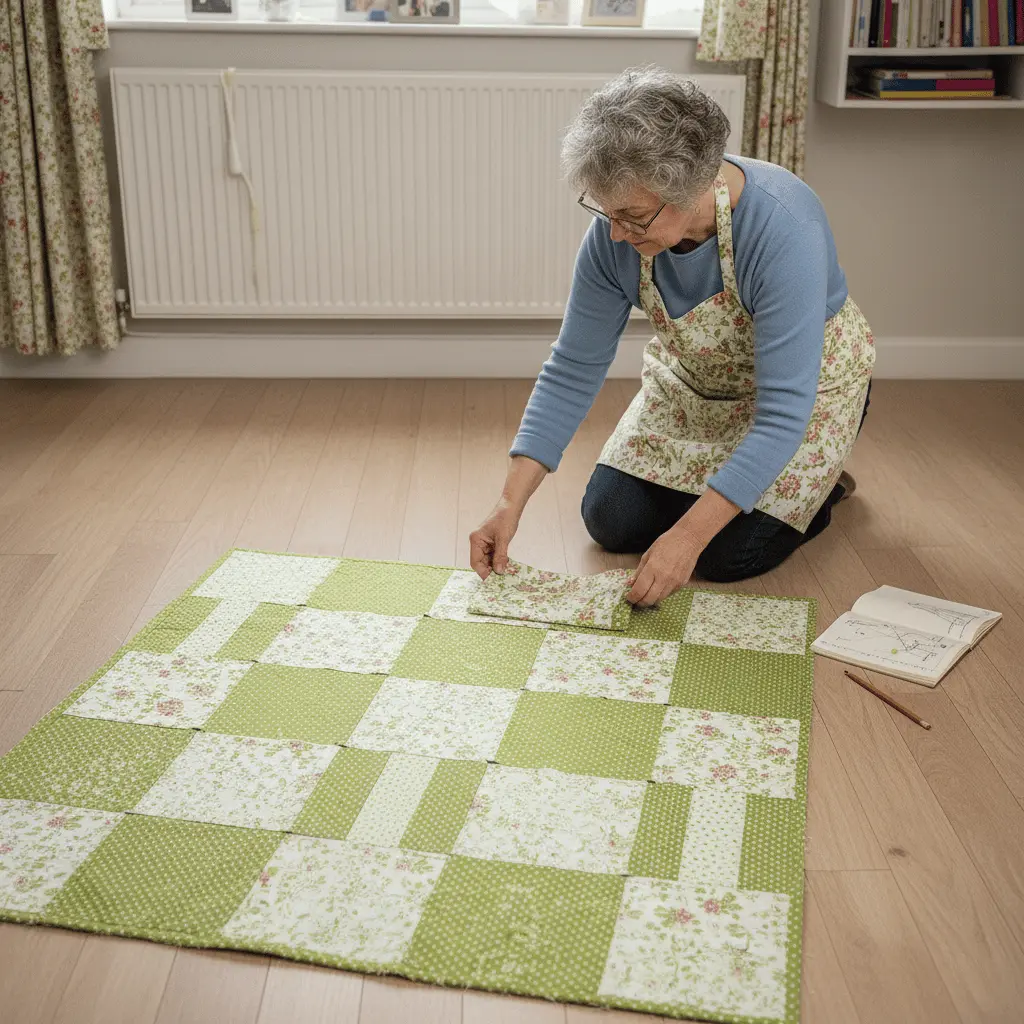
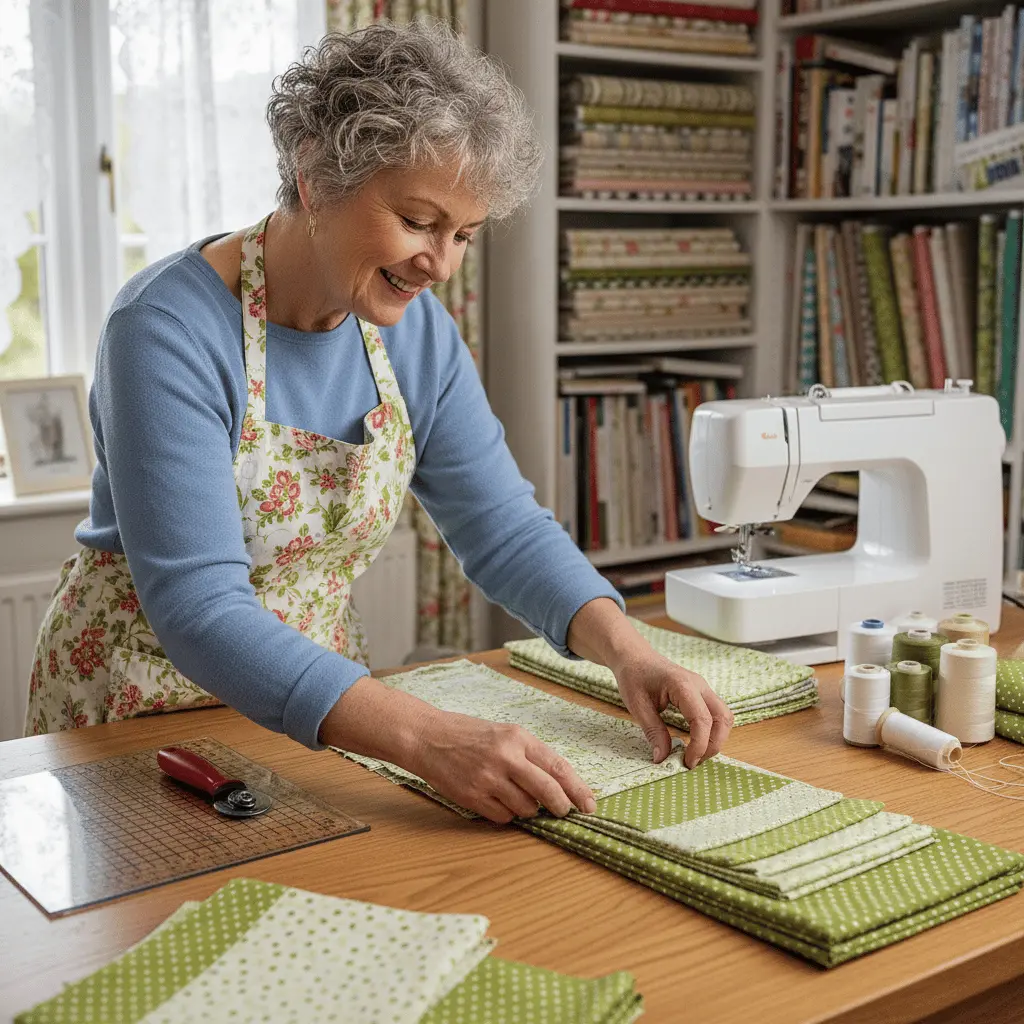
Step 4: Organize and Layout Your Blocks
Arrange squares into nine-patch blocks (5 main fabric squares, 4 background squares in checkerboard pattern). Lay out all 49 blocks on design wall or floor to visualize overall design before sewing.
Design Consideration: Alternate block orientation for visual interest. Ensure even color distribution throughout the quilt top.
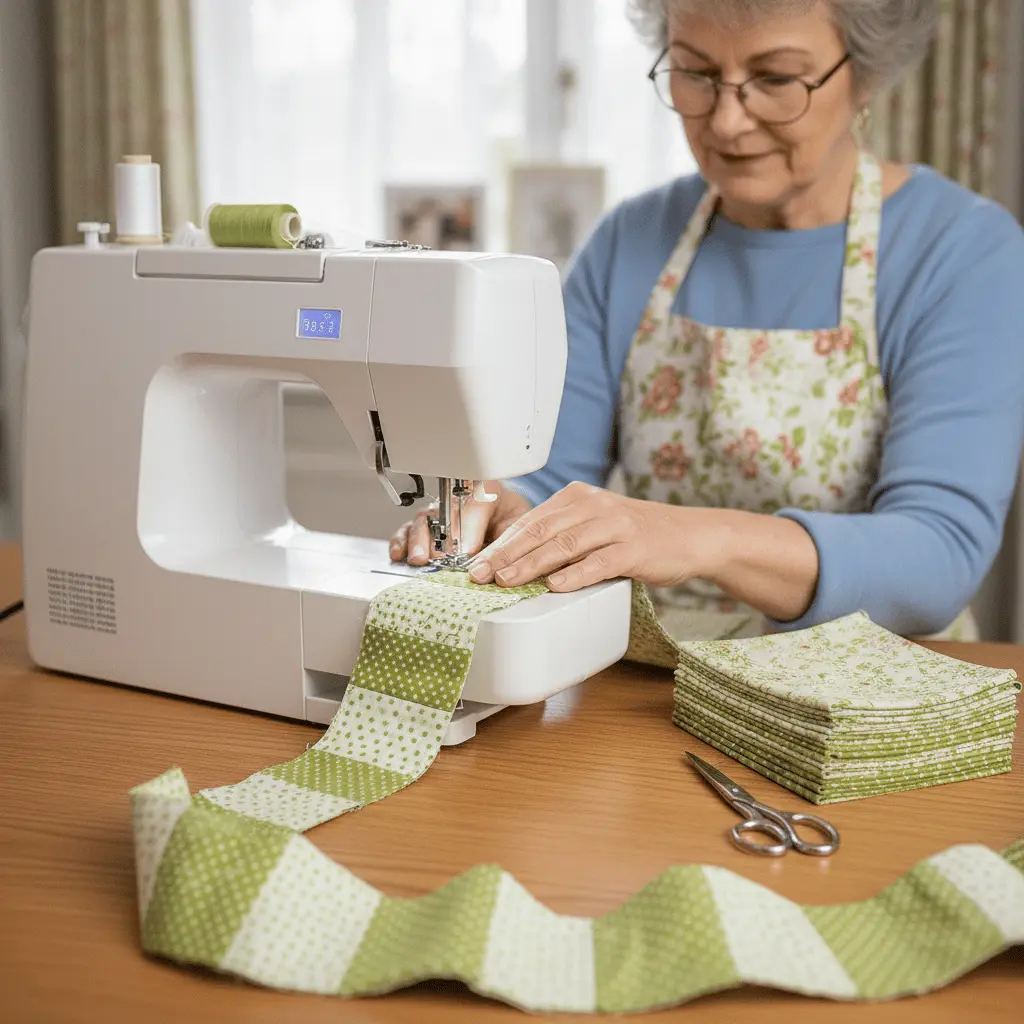
Step 5: Chain Piece the Nine-Patch Blocks
Sewing Process:
- Start with rows: Sew three squares together for each row
- Press seams in alternating directions (Row 1: left, Row 2: right, Row 3: left)
- Sew three rows together to complete each block
- Press final seams open
Chain Piecing Technique: Feed square pairs through machine without cutting thread between. Saves time and thread. Cut apart after sewing entire batch.
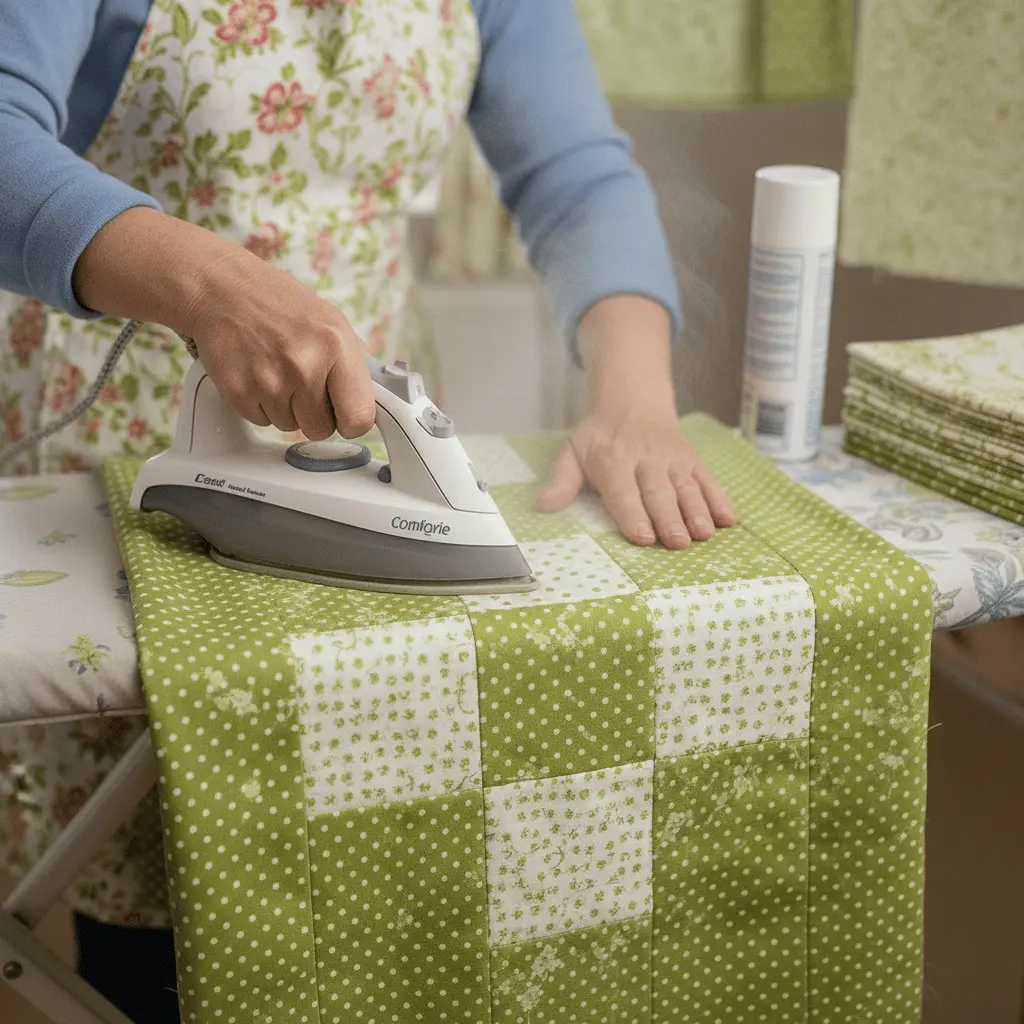
Step 6: Press Each Block Carefully
After completing each nine-patch block, press thoroughly. First press seams flat to set stitches, then press seams open or to the side as planned. Use steam and starch for crisp, flat blocks.
Pressing Matters: Accurate pressing is as important as accurate sewing. Well-pressed blocks fit together precisely, creating professional-looking results.
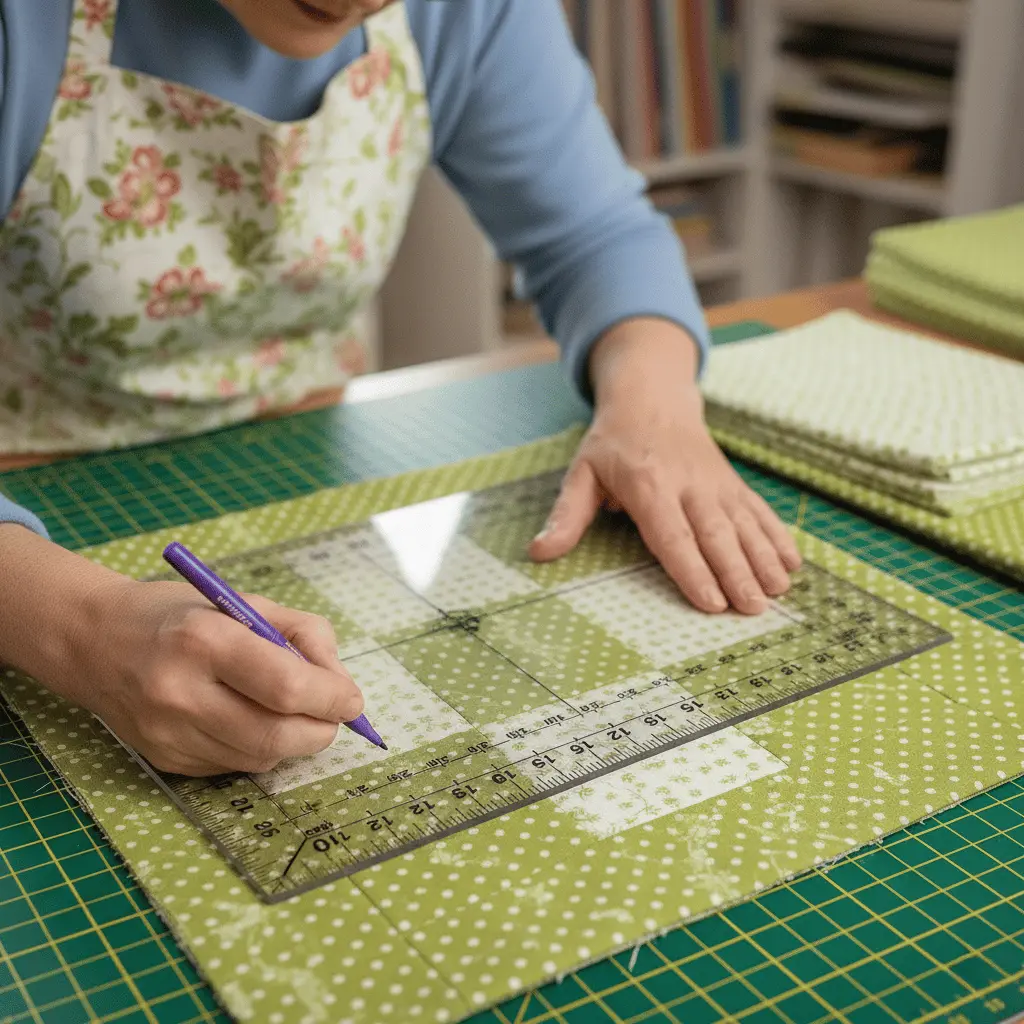
Step 7: Measure and Square Up Blocks
Measure each completed block—should be 15.5″ square (15″ finished size plus seam allowances). Trim any oversized blocks using 12.5″ square ruler, keeping design centered.
Quality Control: Consistent block sizes ensure the quilt top goes together smoothly. Spend time now to avoid frustration later.
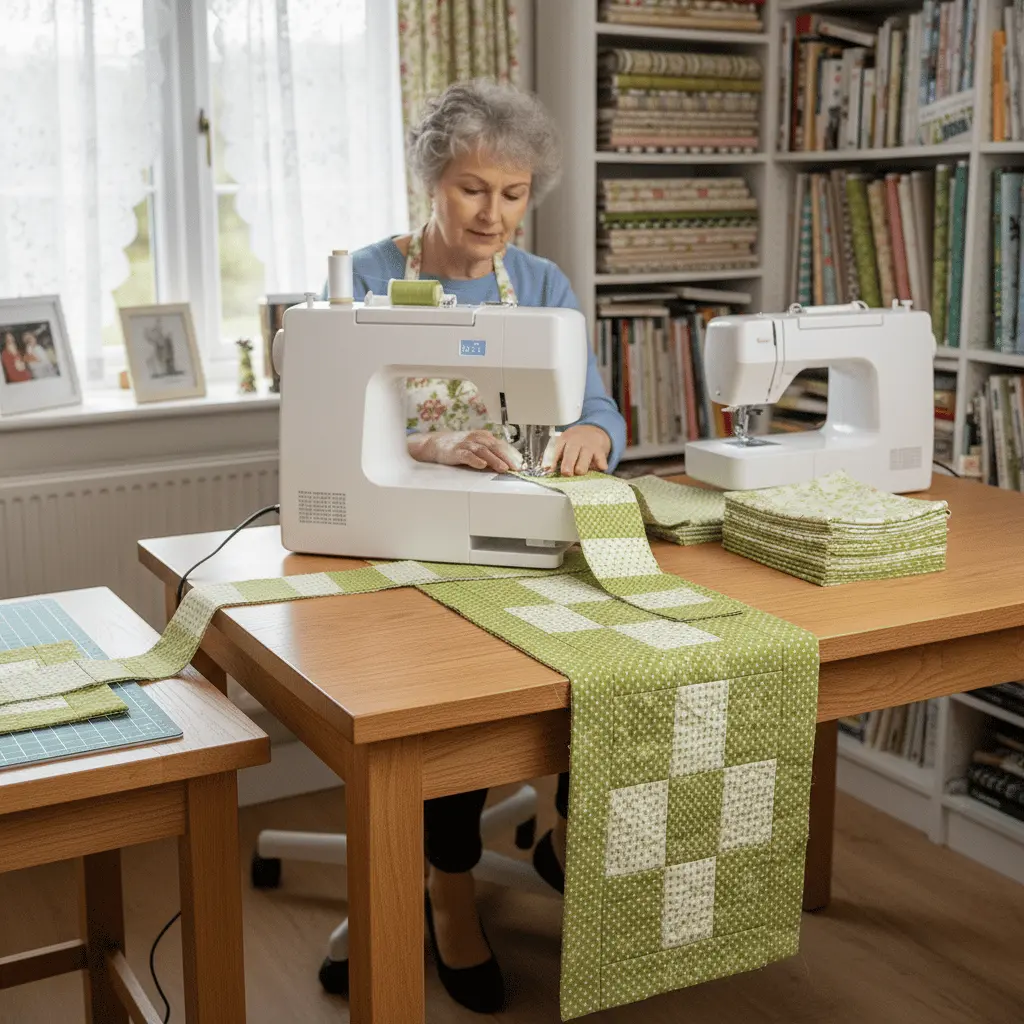
Step 8: Sew Blocks Into Rows
Arrange blocks into 7 rows of 7 blocks each. Pin blocks right sides together, matching seams carefully. Sew each row using consistent 1/4″ seam allowance. Press row seams in alternating directions (Row 1: right, Row 2: left, etc.).
Seam Nesting: Alternating seam directions allows seams to “nest” together when joining rows, creating perfectly matched intersections.
Step 9: Join All Rows Together
Pin rows right sides together, carefully matching all block intersections. Sew rows together using 1/4″ seam allowance. Press long seams open to distribute bulk evenly.
Managing Length: Long seams require patience. Support fabric weight with tables or chairs beside your machine to prevent pulling and distortion.
Step 10: Press the Completed Quilt Top
Press the entire quilt top thoroughly, working in sections. Press all seams open to reduce bulk (critical for king-size quilts). Use plenty of steam and starch. Work on large surface—floor or bed works well.
Final Pressing: This pressing determines how well your quilt will quilt. Take your time creating a smooth, flat surface.
Step 11: Prepare Backing Fabric
For 108″ Wide Backing: Cut backing fabric to 120″ length. Press thoroughly.
For Standard Width Backing: Cut backing into three equal panels (approximately 4 yards each). Remove selvages. Sew three panels together lengthwise using 1/2″ seams. Press seams open. Trim to 120″ x 120″.
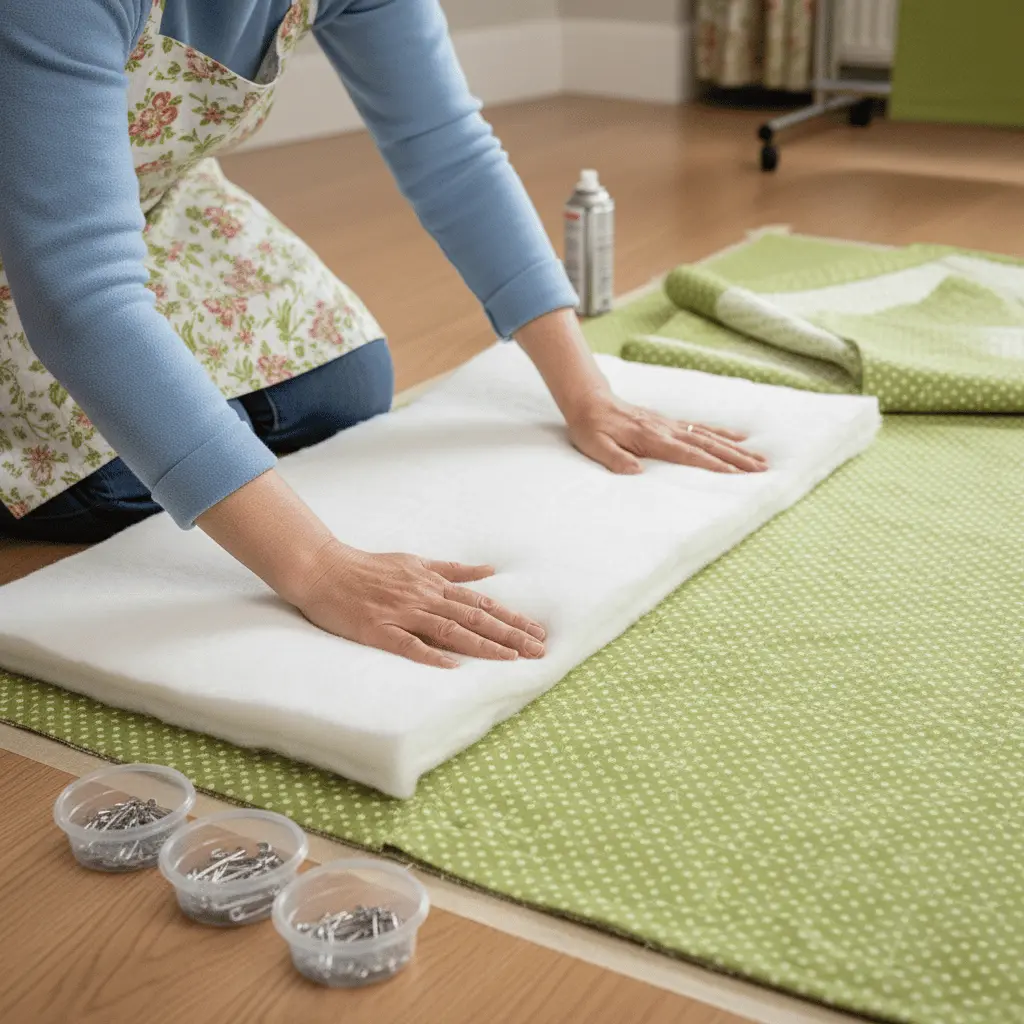
Step 12: Create the Quilt Sandwich (Basting)
Basting Process:
- Lay backing fabric wrong side up on large floor space
- Tape edges to floor with painter’s tape (prevents shifting)
- Smooth batting over backing, ensuring no wrinkles
- Center pressed quilt top right side up over batting
- Smooth from center outward, removing all wrinkles
Basting Options:
- Pin basting: Place curved safety pins every 4-6″ across entire quilt
- Spray basting: Use temporary adhesive spray between layers (faster, less bulk)
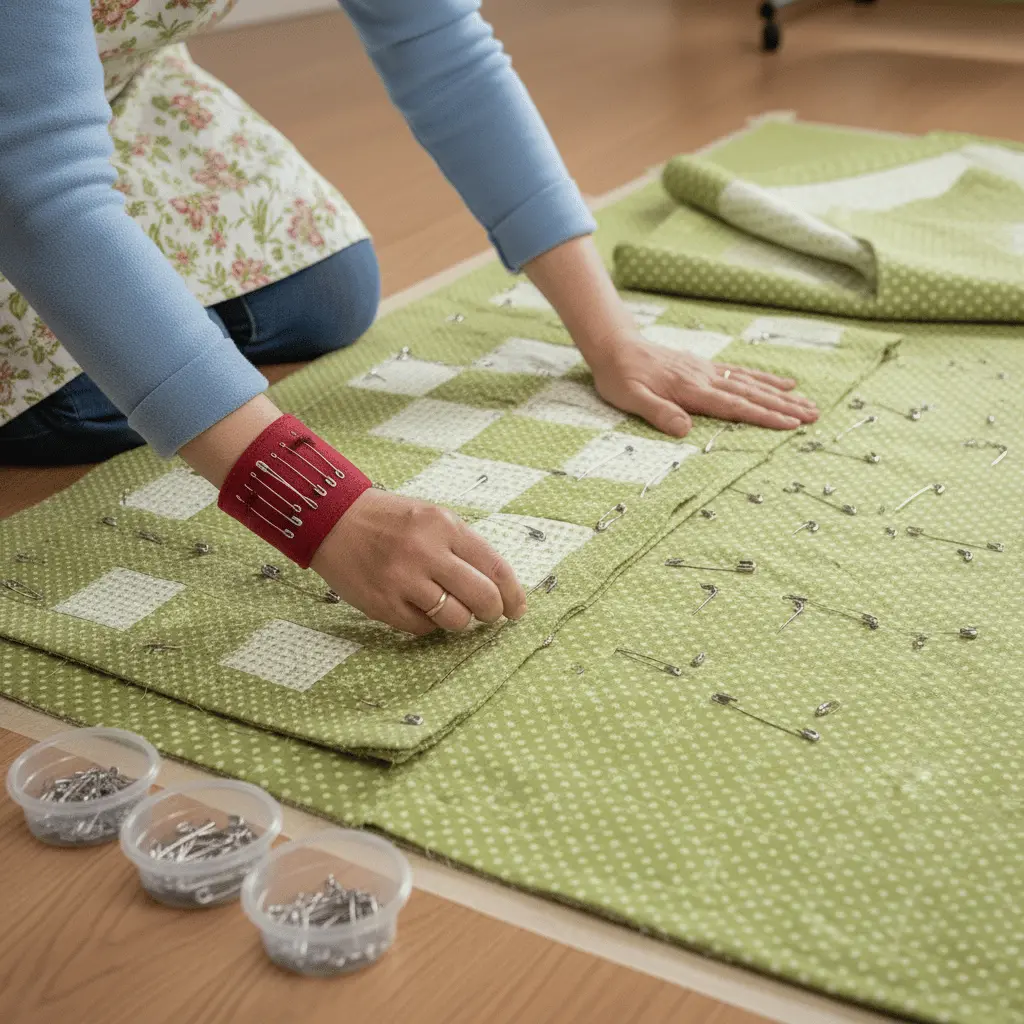
Step 13: Safety Pin or Spray Baste the Layers
Working from the center outward, secure all three layers together. Place curved safety pins every 4-6 inches across the entire quilt surface, avoiding areas where you’ll quilt. Alternatively, spray baste layers for a smoother surface.
Proper Basting: Adequate basting prevents shifting, puckering, and pleats during quilting. Don’t skimp on pins or spray.
Step 14: Plan Your Quilting Design
For king-size quilts on domestic machines, choose simple, manageable designs:
- Straight-line quilting (easiest)
- Stitch-in-the-ditch (follows seam lines)
- Simple meandering
- Quilting in sections/quadrants
Beginner Recommendation: Stitch-in-the-ditch around blocks, then add simple diagonal lines through squares. This provides adequate quilting without overwhelming complexity.
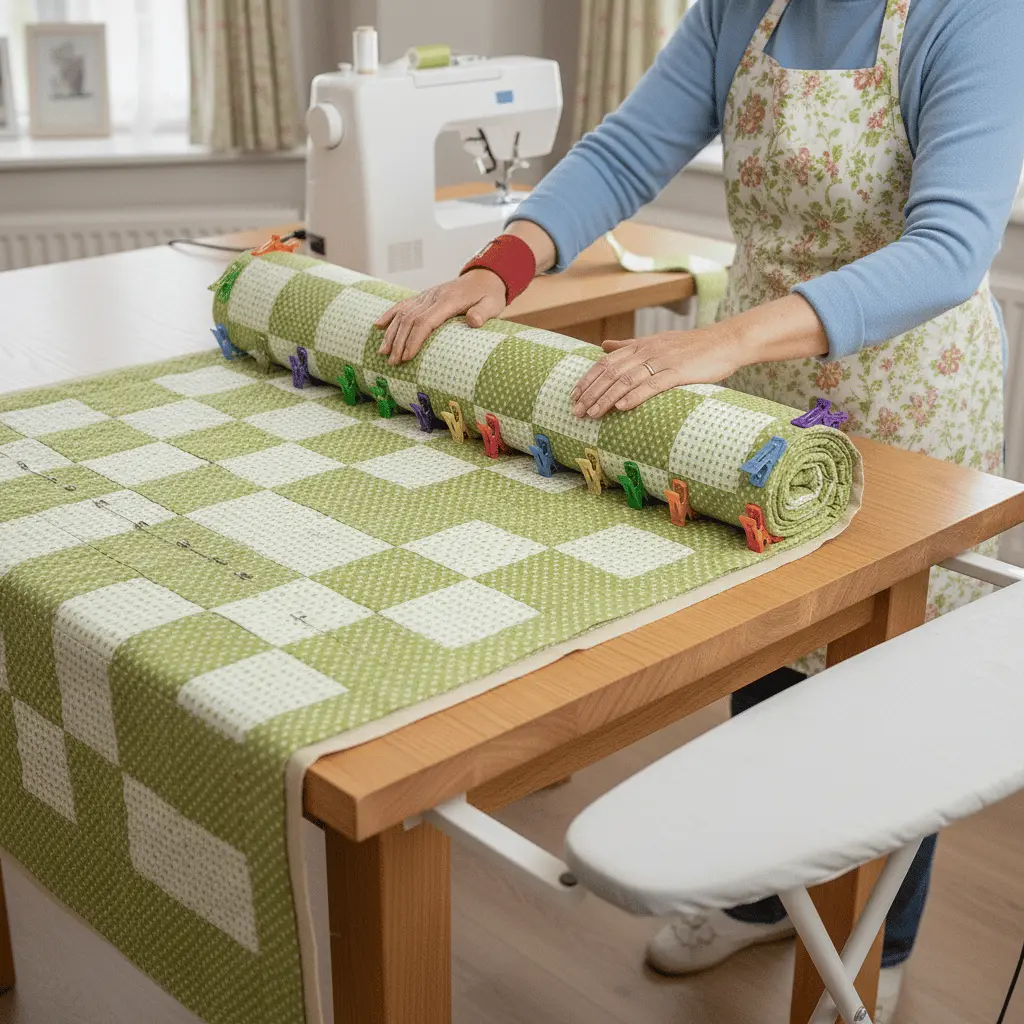
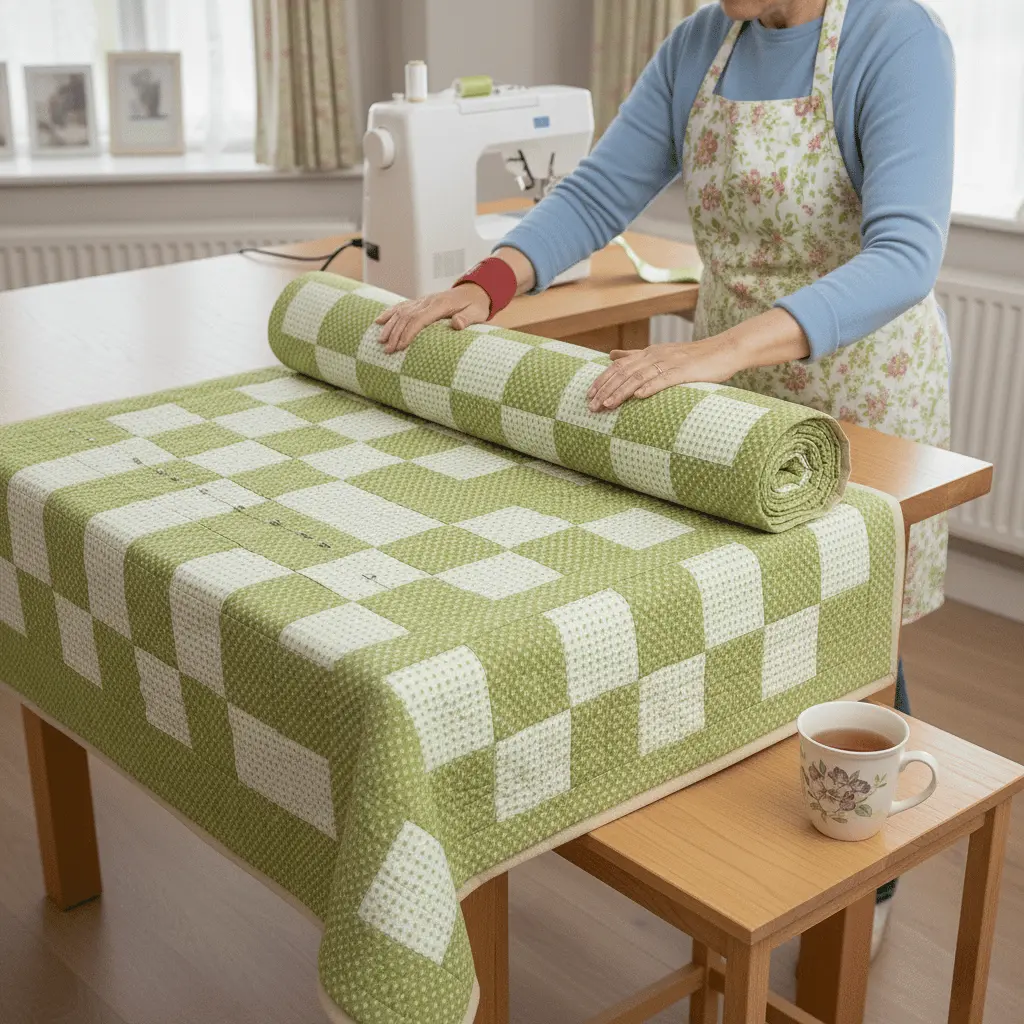
Step 15: Roll and Prepare Quilt for Machine Quilting
Roll the quilt tightly from right side toward the center, leaving the left quadrant accessible. Secure rolls with quilting clips or bicycle clips. This reduces bulk in the machine throat space.
Quadrant Method: Work in four sections: left half, then right half. For each half, start at center and work outward.
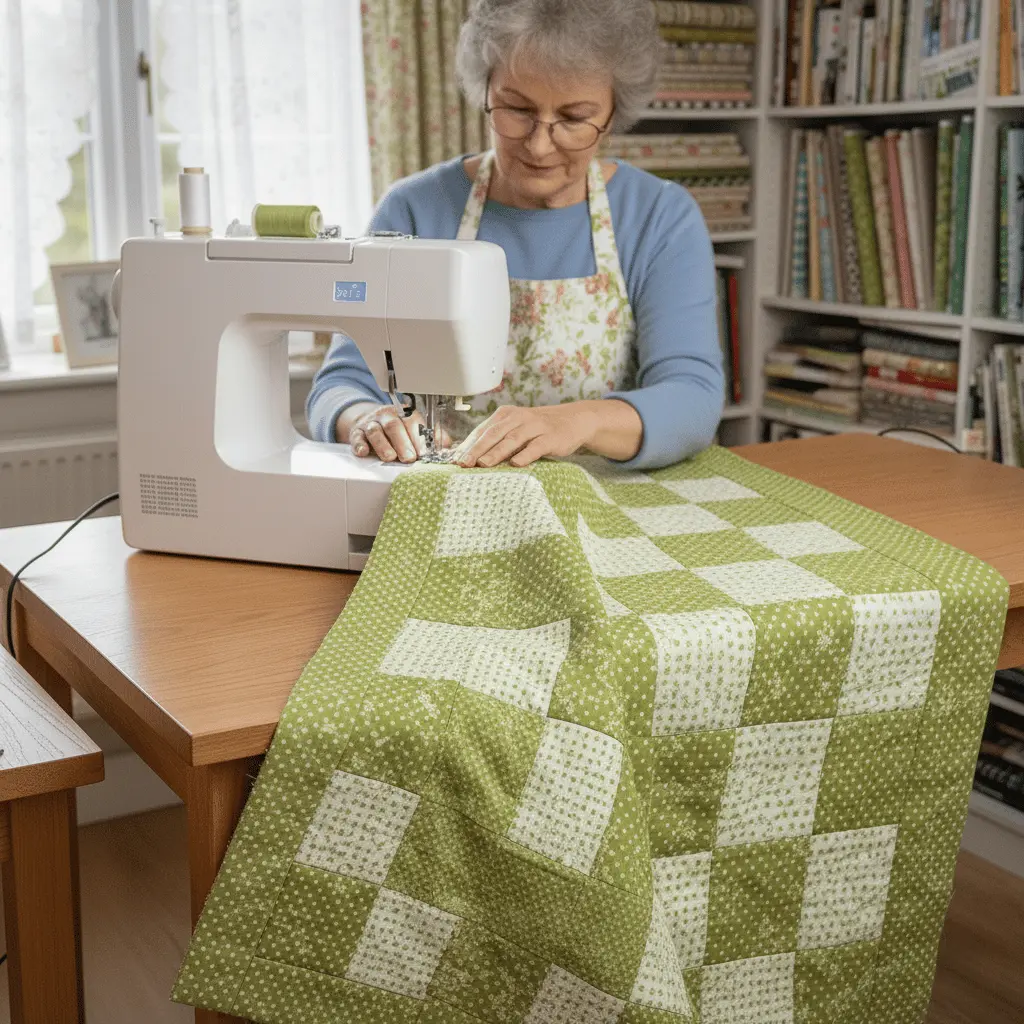
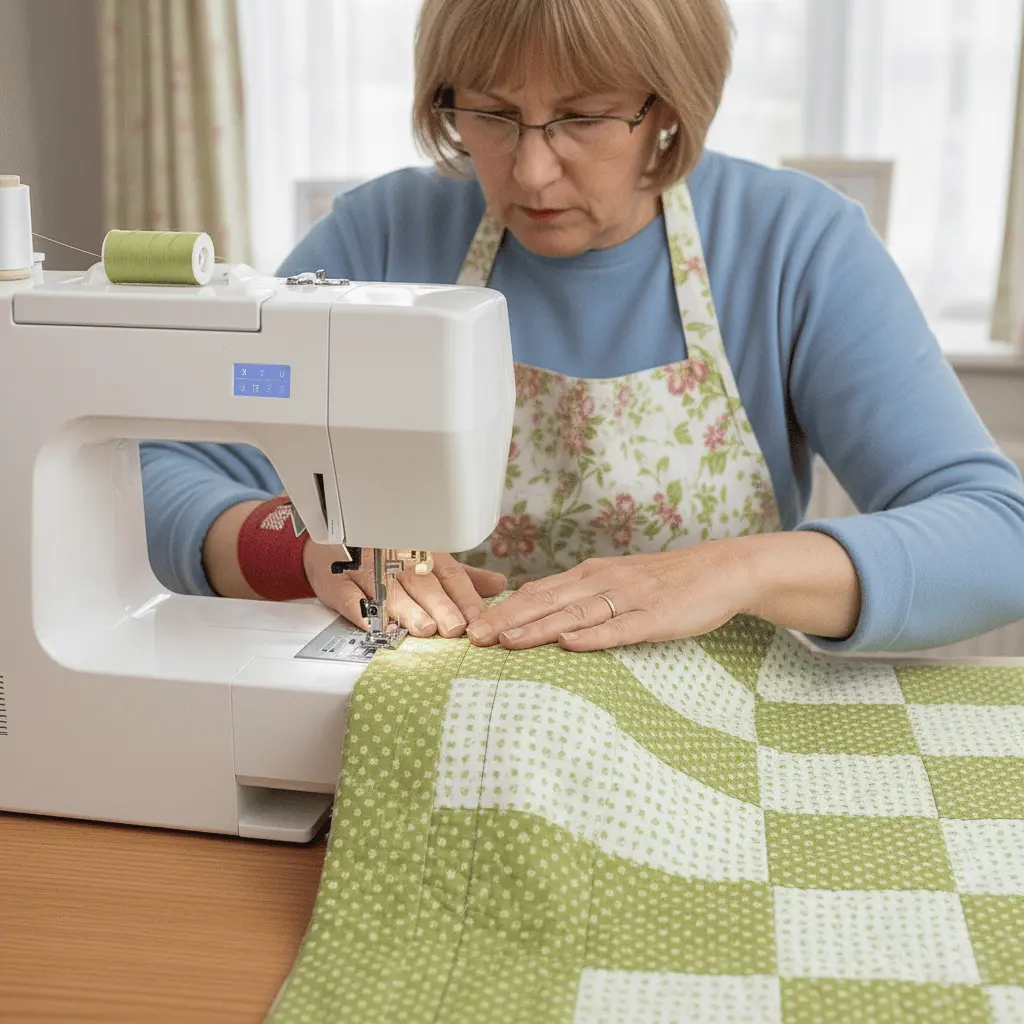
Step 16: Attach Walking Foot and Begin Quilting
Install your walking foot attachment (feeds layers evenly, preventing shifting). Set stitch length to 2.5-3.0. Begin quilting in the center of your accessible quadrant, working toward edges.
First Stitches: Start with vertical lines down the center seam. Lock stitches at beginning and end. Support quilt weight on all sides to prevent pulling.
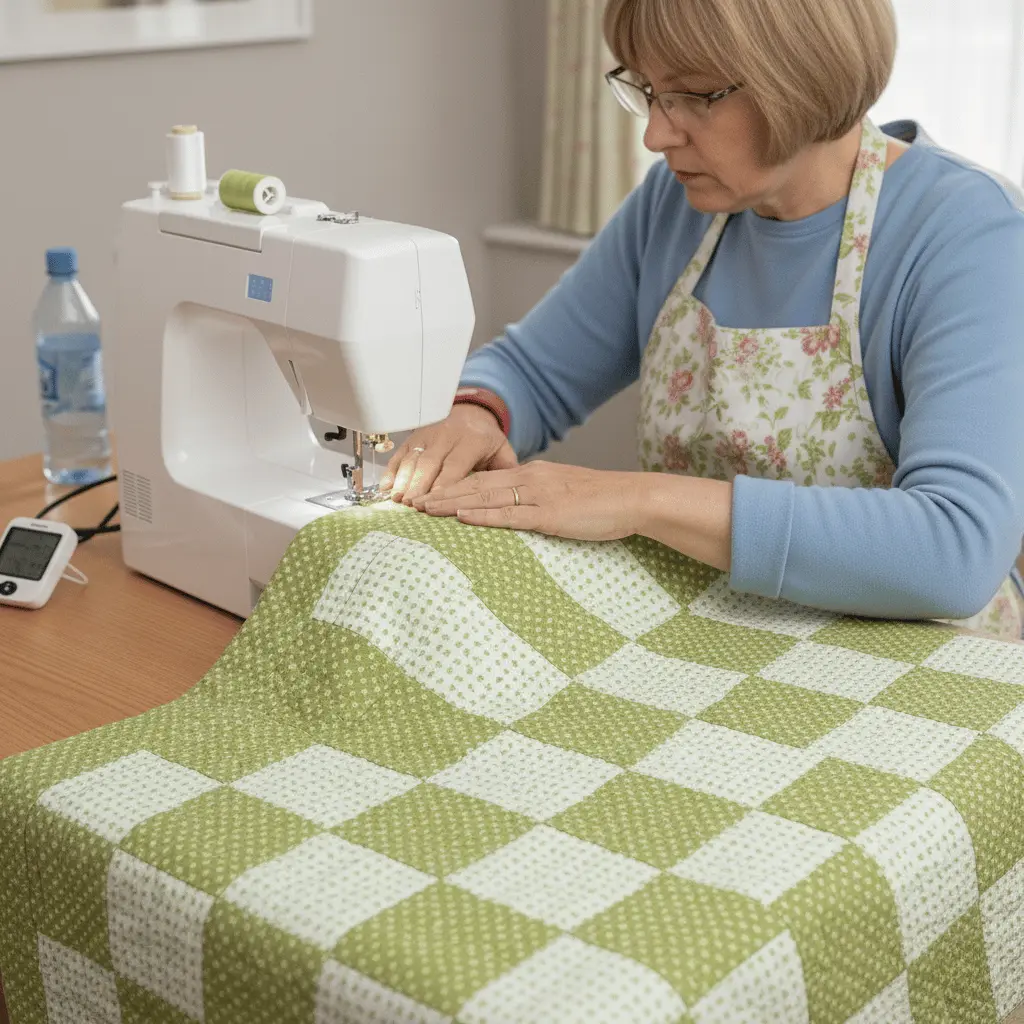
Step 17: Quilt in Straight Lines (Quadrant by Quadrant)
Quilt vertical lines first (with the roll), then horizontal lines (perpendicular to the roll). Work one quadrant completely before moving to the next. Unroll and re-roll as needed to access different sections.
Take Breaks: Stop every 20-30 minutes. Stretch your neck, shoulders, and back. Drink water. Quilting king-size projects requires stamina—pace yourself.
Step 18: Reposition and Quilt Remaining Quadrants
Once the first quadrant is complete, unroll and re-roll the quilt to access the next section. Continue quilting using the same pattern and technique. Work systematically through all four quadrants.
Consistency Matters: Maintain the same stitch length and line spacing throughout. Consistent quilting creates professional-looking results.
Step 19: Complete All Quilting and Remove Basting
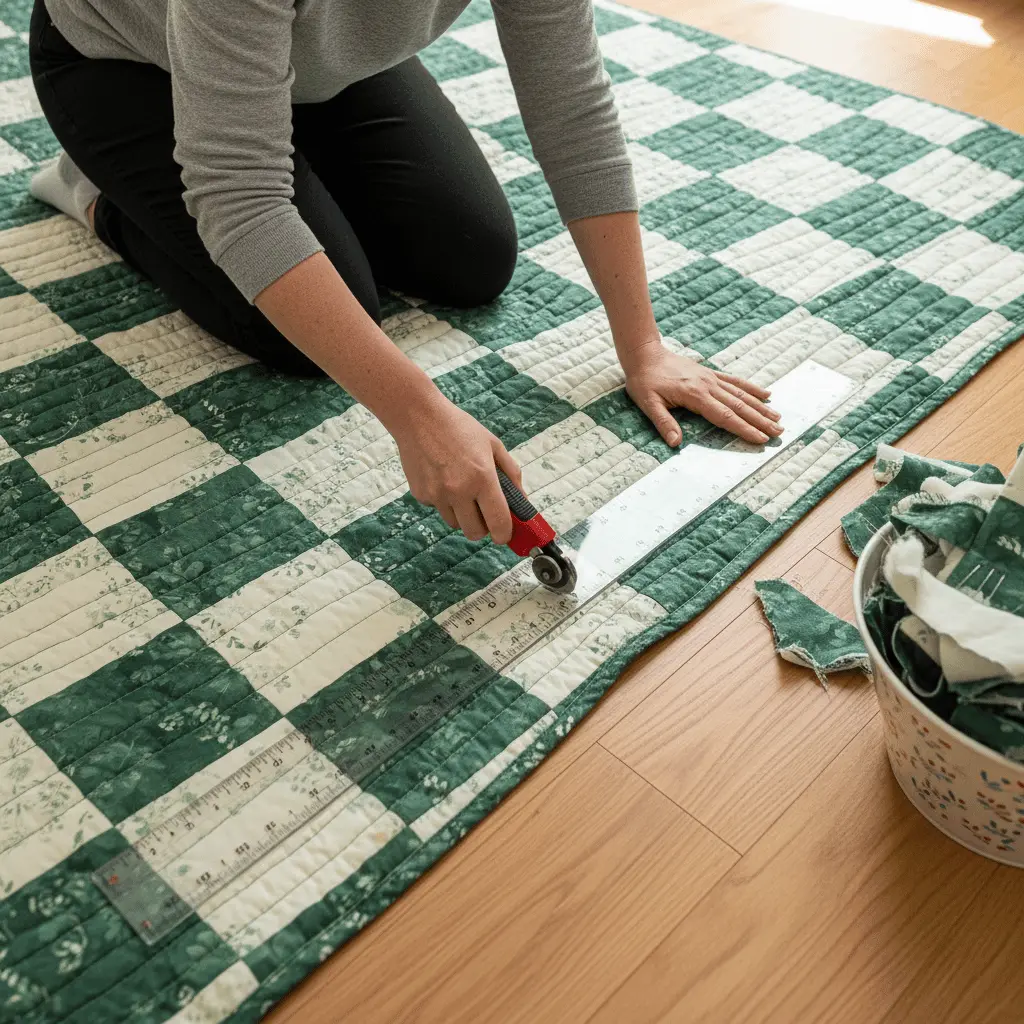
Finish quilting all sections, ensuring even coverage across the entire quilt. Remove all safety pins or residual spray basting. Trim excess batting and backing even with quilt top edges using rotary cutter and ruler.
Final Trimming: Square up corners carefully. Accurate edges make binding easier and ensure the quilt hangs properly.
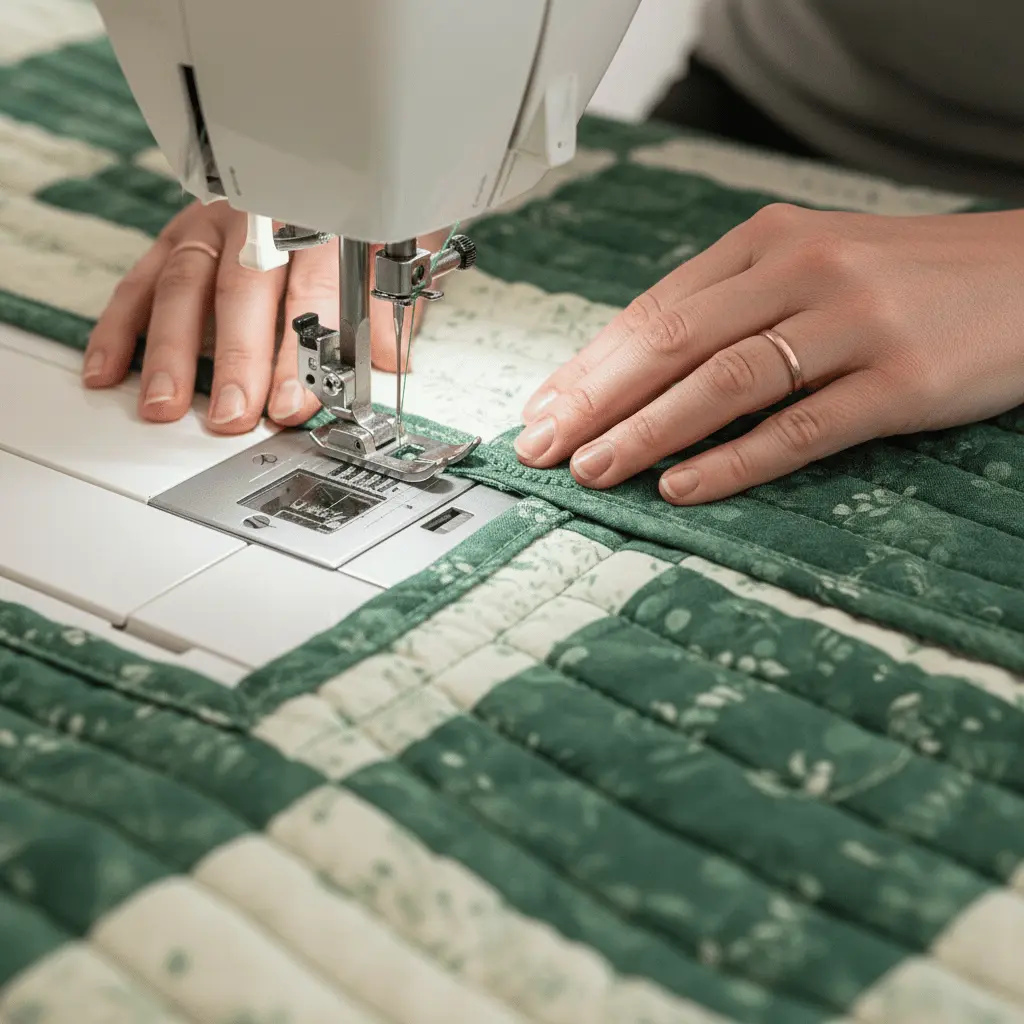
Step 20: Prepare and Attach Binding
Binding Preparation: Cut 2.5″ wide strips of binding fabric. Join strips end-to-end using diagonal seams to create approximately 460″ of continuous binding. Press in half lengthwise, wrong sides together.
Attaching Binding: Starting in the middle of one side (not at a corner), align raw edges of binding with quilt edge. Sew binding to quilt front using 1/4″ seam, mitering corners. Join binding ends with diagonal seam.
Step 21: Hand Stitch Binding to Quilt Back
Fold binding over to quilt back, covering machine stitching. Hand stitch binding in place using invisible ladder stitch or blind stitch. Miter corners neatly as you work around the quilt.
Hand Stitching: This final step requires patience but creates beautiful, durable finish. Many quilters enjoy the meditative quality of hand-stitching binding while watching television.
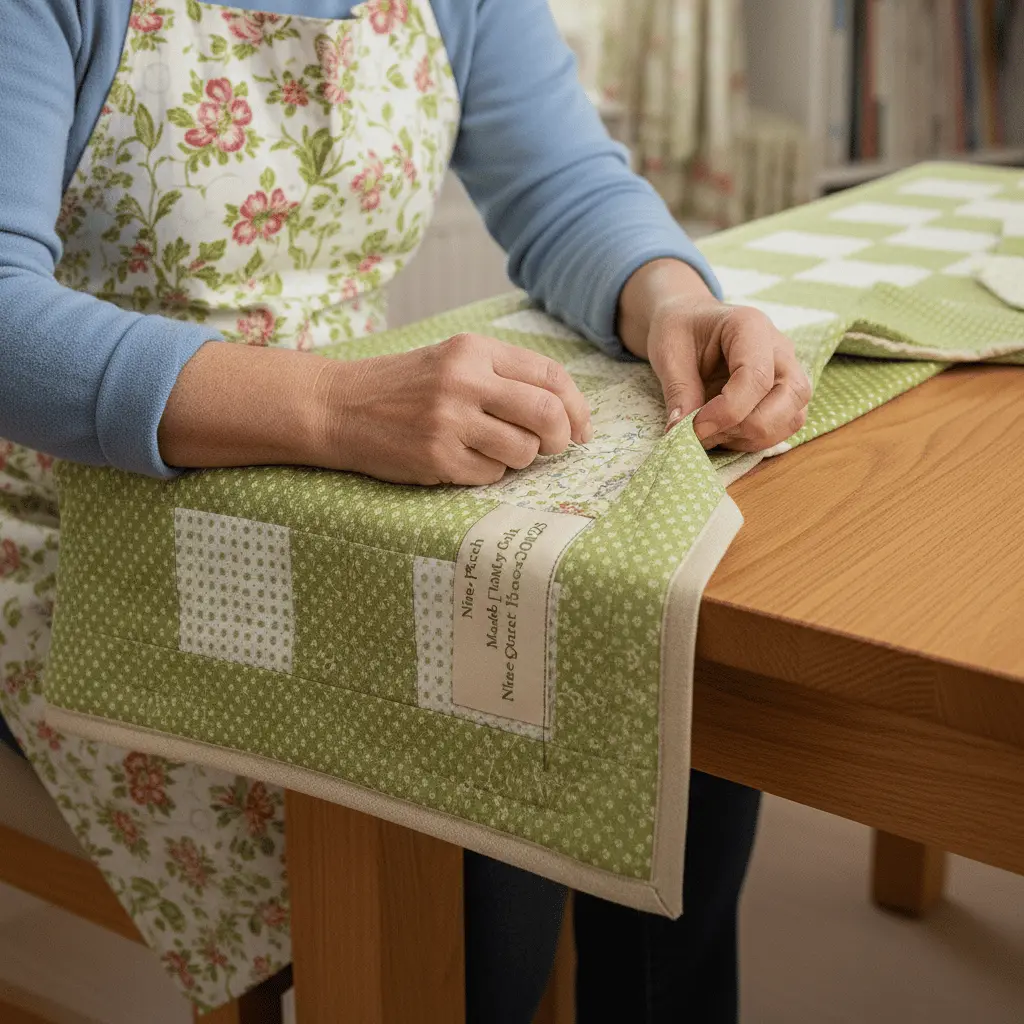
Step 22: Add Quilt Label and Final Inspection
Create and attach a quilt label to the back corner including: your name, date, pattern name, recipient (if gifting). Inspect the entire quilt for any loose threads, missing stitches, or areas needing attention.
Documentation: Labels transform quilts into heirlooms. Future generations will treasure knowing the maker and creation date.
Step 23: Final Pressing and Admiring Your Completed Quilt
Give the completed quilt a final gentle press, being careful not to flatten the quilted texture too much. Use low heat and press from the back. Spread the finished quilt out fully to admire your accomplishment.
Celebration Time: You’ve created a king-size quilt on a regular sewing machine! This achievement demonstrates dedication, skill, and perseverance.
Step 24: Place on Bed and Enjoy
Spread your finished king-size quilt on your bed. Smooth it into place, adjusting the overhang evenly on all sides. Step back and admire how it transforms your bedroom.
Care Instructions: Wash in cold water on gentle cycle. Tumble dry low or line dry. The quilting will relax and develop lovely crinkled texture after washing.
Frequently Asked Questions
How long does it take to make a king-size quilt on a regular machine?
Timeline varies significantly based on experience, pattern complexity, and available sewing time. Simple patterns like nine-patch quilts require 60-100 hours: approximately 20 hours cutting and piecing, 10 hours pressing and basting, 40-60 hours quilting (longest phase), and 10 hours binding. Working 10 hours weekly means completing your quilt in 2-3 months. Complex patterns with intricate piecing or detailed quilting may require 150-200 hours spanning 4-6 months. Breaking the project into daily or weekly goals maintains momentum without burnout.
What’s the biggest challenge quilting king-size on a domestic machine?
Managing bulk presents the primary challenge. King quilts contain significant fabric weight that must fit through limited throat space (typically 5-9 inches on domestic machines). Solutions include: rolling quilt tightly and securing with clips; positioning support tables around your machine preventing fabric from pulling; working in quadrants rather than attempting full-quilt access; taking frequent breaks to prevent physical strain; and choosing simple quilting designs requiring less quilt manipulation. Many quilters find straight-line quilting or stitching-in-the-ditch most manageable for large projects.
Should I use special thread or needles for king-size quilts?
Standard quilting supplies work perfectly. Use quality cotton or cotton-polyester blend thread (50 weight) providing strength without bulk. Universal needles size 80/12 or 90/14 suit most quilting cotton. Replace needles every 8-10 hours of quilting—dull needles cause skipped stitches and thread breakage. Walking foot attachment is essential (feeds layers evenly preventing shifting). Consider quilting gloves providing better grip when maneuvering large quilts. Quality supplies prevent frustration and ensure professional results regardless of quilt size.
Can I quilt a king-size quilt in one continuous session?
Absolutely not recommended! Quilting king-size projects requires 40-60 hours—spreading this work over multiple sessions prevents physical injury and mental fatigue. Take breaks every 20-30 minutes during quilting sessions, stretching neck, shoulders, and back. Limit individual quilting sessions to 2-3 hours maximum. Hunching over machines for extended periods causes muscle strain, neck pain, and eye fatigue. Many quilters enjoy spreading projects over weeks or months, working when energy and motivation peak. Quilting should bring joy, not injury—pace yourself appropriately.
What if my sewing machine has a small throat space?
Machines with 5-6 inch throat space successfully quilt king-size projects using proper techniques. Work in smaller quadrants (quarters or even eighths). Roll quilt very tightly, securing multiple points along rolls. Choose simple quilting designs requiring minimal quilt repositioning—straight lines parallel to block seams work beautifully. Consider free-motion quilting in small sections rather than attempting long continuous lines. Utilize all available support surfaces preventing fabric weight from pulling. Alternatively, many quilters piece king tops at home then send to longarm quilters for finishing—combining home piecing satisfaction with professional quilting ease.
Leave a Reply