Sewing a quilted jacket involves three main phases: creating patchwork fabric, quilting layers together, then assembling jacket pieces following a pattern. Quilted jackets dominate 2025 spring trends as the ultimate transitional layer, with DIY versions offering customization impossible with ready-made options.
This tutorial covers pattern selection through final finishing, walking you through each step to create a professional-looking quilted jacket.
Full Tutorial check here
Choosing Your Pattern and Essential Supplies
Start with patterns designed for heavyweight or quilted fabrics. The Daphne Jacket by Vivian Shao Chen offers simple construction without collars or buttonholes, making it ideal for beginners. The Grainline Studio Tamarack Jacket is another popular choice among sewers.
Critical first step: Make a muslin test garment. Quilted fabric adds bulk requiring 1-2″ extra ease beyond your normal measurements. Skip this and you’ll end up with a jacket that doesn’t fit.
Essential Tools and Materials
Tools:
- Walking foot attachment (prevents puckering by feeding top and bottom layers evenly)
- Rotary cutter, 6″×24″ quilting ruler, self-healing cutting mat
- Curved safety pins for basting
- Clips for handling thick seams
Materials:
- Outer fabric: Quilting cotton or linen (3-4 yards)
- Batting: 100% cotton provides warmth with good drape; 80/20 cotton-poly blend is lighter and doesn’t shrink as much.
- Backing fabric (2-3 yards)
- Bias binding (8 meters total)
- Polyester thread
Cutting Patchwork Squares
Standard square size: Cut 3.25″ squares that finish at 2.75″ after sewing with 1/4″ seams. For a medium jacket, you’ll need approximately 366 squares total—70 squares for each front piece (×2), 60 for each sleeve (×2), and 106 for the back.
Cutting technique: Square your fabric using the selvage edge as a guide. Cut strips at your desired width, then cut squares from those strips. This speeds up the process significantly compared to cutting individual squares. Avoid cutting on the bias by checking that your ruler aligns parallel to the fabric’s horizontal and vertical threads.
For scrap fabrics, individually square each piece before measuring. Lay pattern pieces over your fabric to determine exact square counts, accounting for 10-15% shrinkage after seaming.
Piecing Squares Together
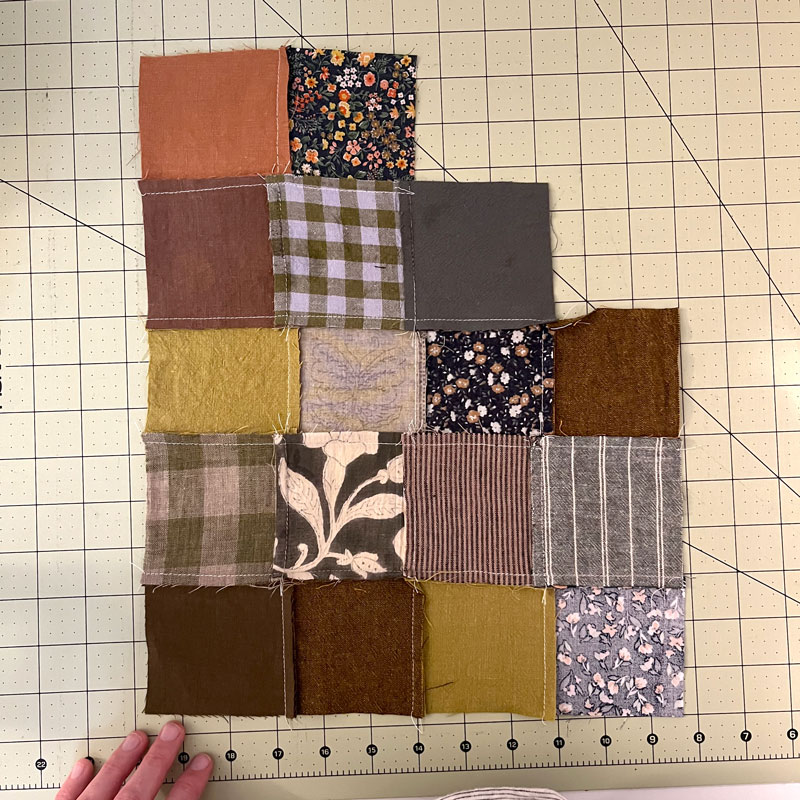
Sew squares into horizontal rows using consistent 1/4″ seams. Chain piecing speeds things up—feed square pairs through your machine without cutting thread between them.
The nesting seam technique is crucial: Press Row 1 seams to the left, Row 2 seams to the right, alternating throughout. This creates “nested” seams that lock together for perfect corners when you sew rows together. You’ll immediately see the difference in how cleanly your intersections align.
Alternative: Press seams open for an ultra-flat finish, though this works better for stitch-in-the-ditch quilting patterns.
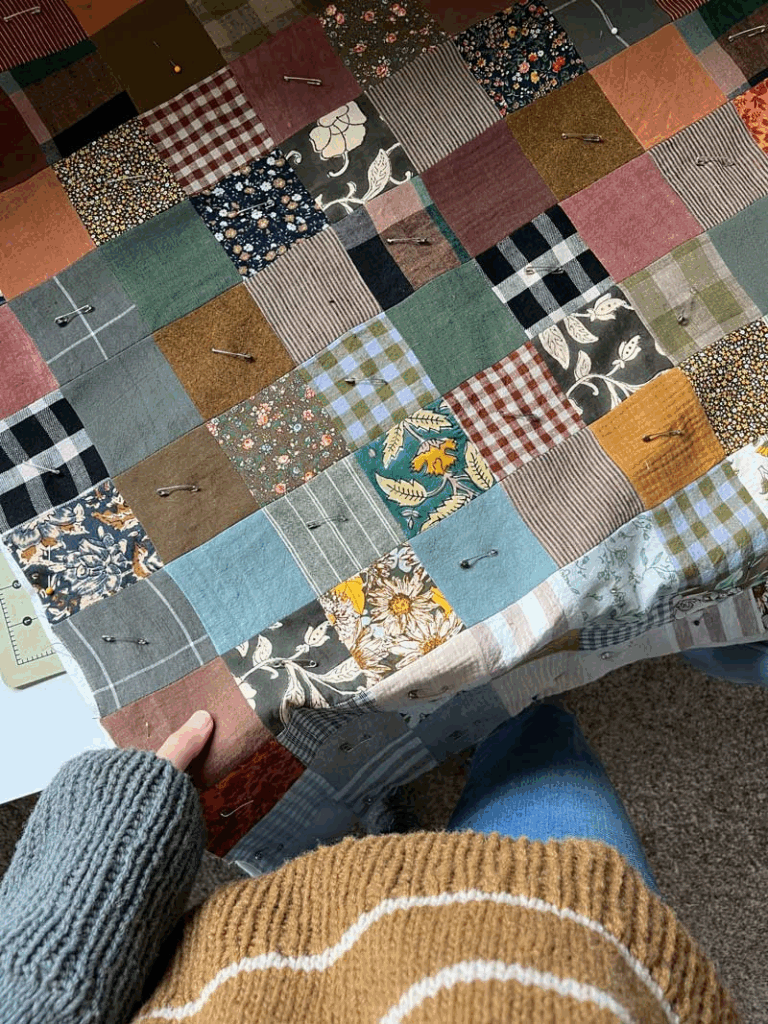
Creating the Quilt Sandwich
Pre-wash all fabrics to prevent post-assembly shrinkage disasters. Cut backing fabric 1/4″-1/2″ larger than your patchwork top. Cut batting to match backing size. Press everything flat—wrinkles now mean puckers later.
Layer assembly order (work on a flat table or floor):
- Bottom: Backing fabric right side DOWN
- Middle: Batting
- Top: Patchwork right side UP
Start pinning from the center, smoothing toward edges to eliminate trapped air and wrinkles. Space curved safety pins 4″ apart (fist-width rule) throughout the sandwich. Avoid straight pins—they’ll poke you constantly during sewing.
Quilting the Layers
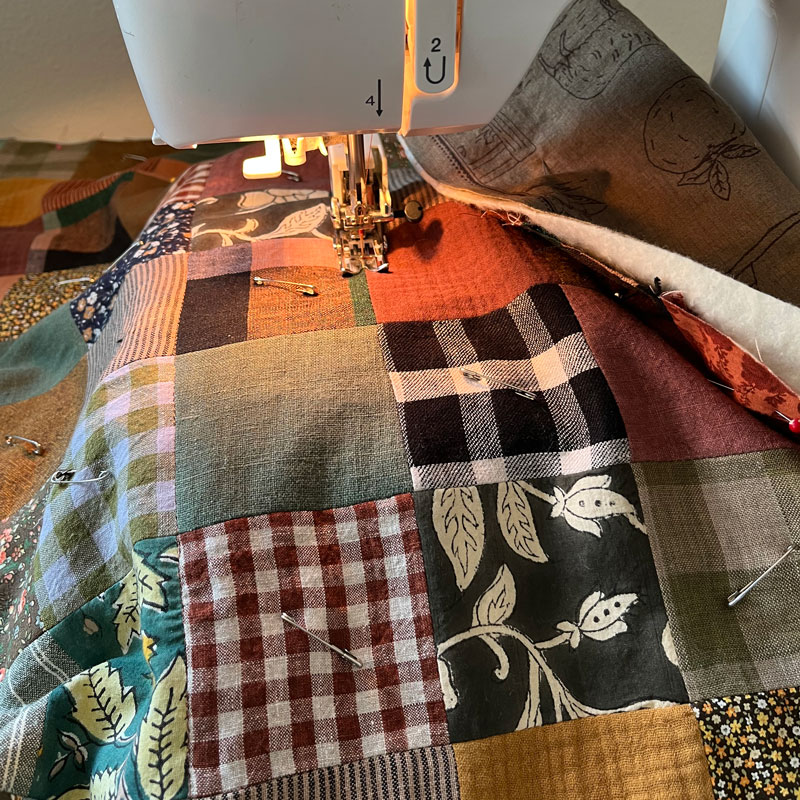
Install your walking foot and set stitch length to 2.5-3.0 (longer stitches handle thickness better). The walking foot’s feed dogs grab fabric on top and underneath simultaneously, preventing shifting and puckering.
Quilting pattern options:
- Stitch-in-the-ditch: Sew directly in seam lines between squares (most invisible)
- Grid quilting: Mark 6″×6″ squares across fabric for structured lines
- Diagonal: Sew through square corners for dynamic movement
Don’t quilt into seam allowances—stay 1/4″ inside all edges. Remove pins just before reaching them to avoid needle strikes.
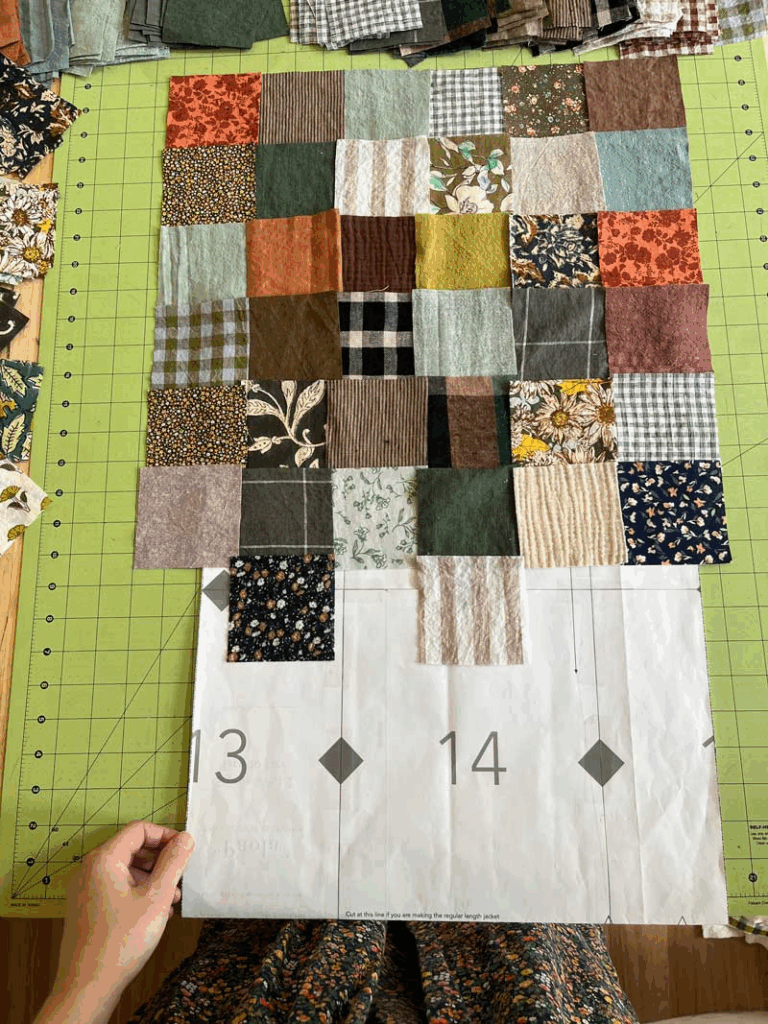
Cutting and Preparing Pattern Pieces
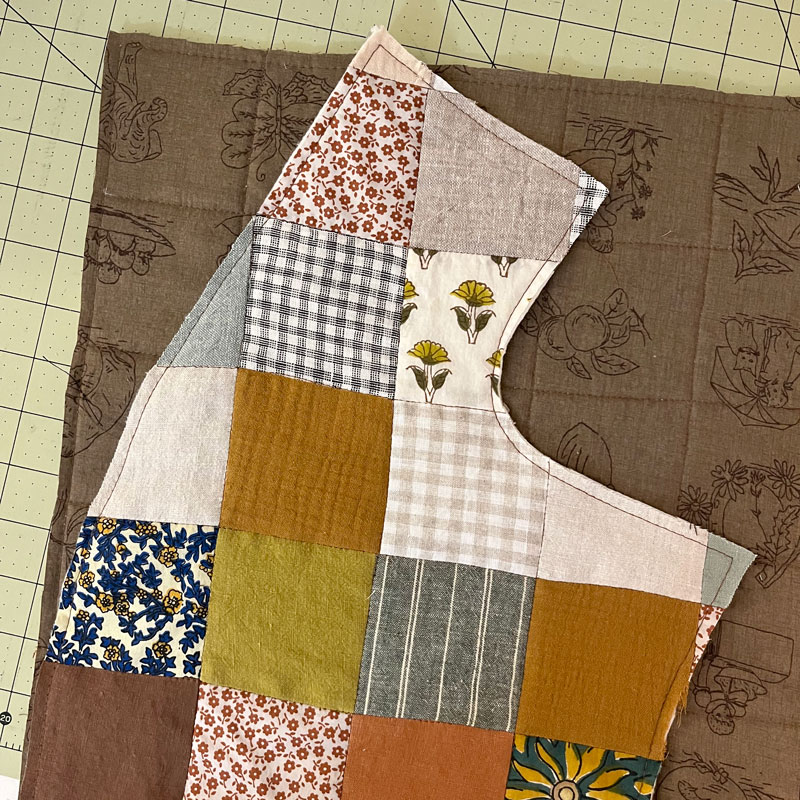
Lay pattern pieces on quilted fabric. Cut the back piece on fold, then mirror front and sleeve pieces for left/right sides. Immediately sew a basting stitch 1/4″ from all edges—this stabilizes layers and prevents stretching when maneuvering thick fabric through your machine.
Jacket Assembly and Seam Finishing
Standard garment construction applies, but account for fabric thickness by using clips instead of pins. You have three seam finishing options:
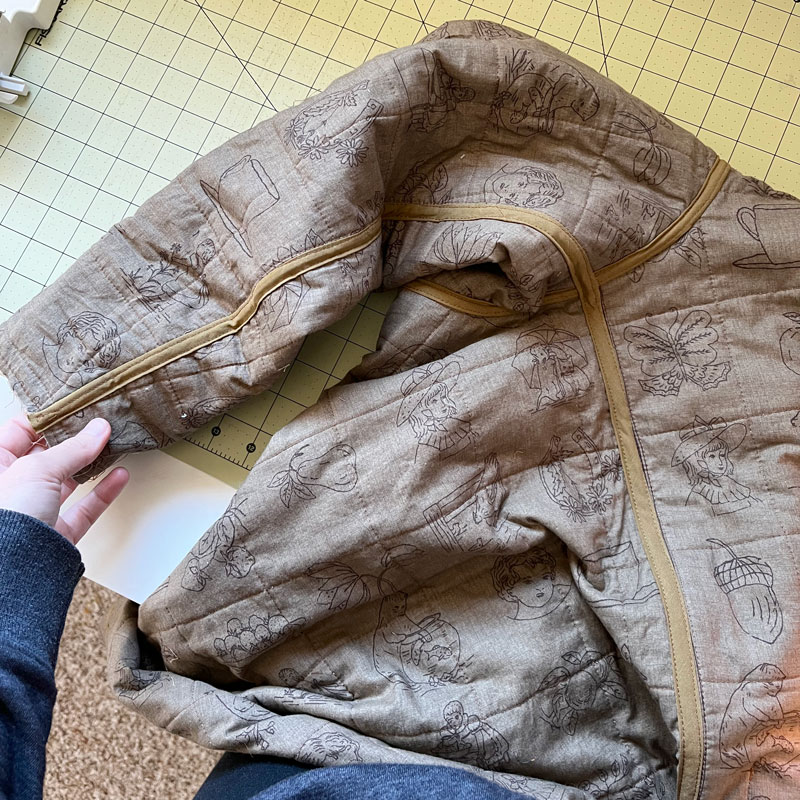
Bias Binding Method (Reversible, Most Professional)
Attach 1″ bias binding along internal seams to create flat, finished seams visible on both sides, allowing reversibility. This is time-consuming but produces the cleanest result. The underarm-to-sleeve seam is trickiest—sew slowly, scrunching fabric carefully to avoid catching the lower layer.
Hong Kong Seams: Bias strips wrapped around raw edges provide a professional finish faster than full binding.
Serged Seams: Quickest option using an overlocker, though not reversible. Good for lined jackets where interior seams won’t show.
Grade seam allowances by trimming batting close to seams to reduce bulk.
Binding Outer Edges
Make custom bias binding by cutting 2″ bias strips and running them through a bias tape maker, or purchase pre-made binding. You’ll need approximately 8 meters total for edges, pockets, and closures.
Application method:
- Pin bias tape right side to wrong side of jacket
- Sew with 1/4″ seam allowance
- Press away from jacket
- Fold over to right side, tucking edge under 1/4″
- Edge stitch from right side
Use mitered corner techniques for neat angles at collar and hem intersections. Bind pocket edges before attaching pockets to jacket front.
Alternative Approaches
Using Pre-Quilted Fabric: Skip sandwiching and quilting entirely. Start at cutting pattern pieces. Faster but less customizable.
Upcycling Existing Quilts: Queen-size quilts provide enough fabric for most jacket patterns. Source from estate sales or thrift stores. Cut strategically to preserve interesting quilt designs, turning vintage textiles into wearable art.
Frequently Asked Questions
What’s the easiest beginner pattern?
The Daphne Jacket by Vivian Shao Chen offers simple construction without collars or buttonholes, with bias-bound edges creating a professional finish without complex techniques.
How much fabric do I need?
For medium size: 3-4 yards patchwork fabric, 2-3 yards backing, twin-size batting, 8 meters bias binding. Always check your specific pattern’s requirements.
Can I quilt on a regular sewing machine?
Yes. Standard home machines work fine. A walking foot attachment ($20-40) prevents puckering but isn’t mandatory—just sew slowly without one.
Should I wash the finished jacket?
Yes. Washing creates the soft, crinkled texture that makes quilted jackets appealing. Pre-wash all materials before construction to prevent uneven shrinkage.
How long does this take?
Budget 20-30 hours total: 6-8 hours piecing, 4-6 hours quilting, 8-12 hours assembly. Most makers spread this over 2-3 weekends.
What batting works best for jackets?
100% cotton batting provides warmth with good drape; 80/20 cotton-poly blend is lighter, easier to work with, and doesn’t shrink as much. Choose based on your climate and desired warmth.
Can I make a quilted jacket reversible?
Yes. Using the bias binding method for internal seams creates a fully reversible jacket. Choose coordinating fabrics for your backing layer so both sides look intentional.
Leave a Reply